Saturday, November 30, 2013

Designer Chat with Claudine Hellmuth

Image (4)Today we are having another episode of ‘Designer Chat’. This is where I  ask a designer  if they could share what Christmas Love & Charity means to them. I also ask if they can share some of their awesome talents!

Today’s guest is the {WONDERFUL} Claudine Hellmuth. I met Claudine me very first time a few years ago at a CHA show in Los Angeles. It was my very first time traveling all by myself and I was SO nervous, specially going to such a BIG show in such a BIG city. When I met Claudine, well not only was I blown away because of her amazing talents, but also because of her amazing sweet heart and personality! She really is amazing!  I would like to introduce you to Claudine Hellmuth…

claudine_CHA

I've always loved holiday crafting. When I was about 7 years old I started my own crafting club, complete with hand made announcement cards that I sent out to a few friends. Our first project was a pine cone Christmas tree complete with glitter (of course!), mini presents and cotton snow. They all turned really great and I so wish we had photos of them now! This was long before scrapbooking so many moments went on undocumented :)

So I think it's no surprise that now 32 years later, I'm still loving Christmas crafts, and I've got a freebie tree project to share with you! This is a little pink Christmas tree that you can download, print and make and even add glitter to it if you like!

madison

Here's a photo of my adorable niece Madison putting hers together! She loved it!

free_printable_tree

FREE CHRISTMAS FREE DOWNLOAD LINK: http://claudinehellmuth.blogspot.com/2012/11/free-printable-christmas-tree-to.html

Thank-you SO much Claudine!

You can find all of Claudine’s wonderful things here:

shop: whimsicalprintableparty.com
blog: claudinehellmuth.blogspot.com
twitter: twitter.com/collageartist
facebook: facebook.com/claudinespage
newsletter: http://mad.ly/signups/62164/join

photo (11)

Have you joined in for the next contest with the Christmas Love Contest?

Make a tag and share some love ….. you might win a basket full of goodies including this wonderful book from fwmedia.

FWmediare3

Find out all the contest details HERE.

photo (13)

photo (12)

My daughter and I are having fun making tags in the studio today. We are going to bake some Christmas cookies to go with them and have some fun surprising some people later on. I LOVE creating smiles especially when we make a family activity. Be sure to take a look at all the wonderful work that people have been uploading to the blog!!! SO AWESOME!!! Thank-you to everyone for helping to spread some LOVE!!!

hugs,

Susan xo

Ball Ornament Trio

I keep seeing all these cute little ornaments everywhere, glass or plastic balls that are hollow, spherical just begging to be filled with something.  So I did!

Here is the trio I made using lots of items from Ranger, Core'dinations, May Arts ribbons, and of course Susan K. Weckesser stamps!!


 You can find these spherical ornament balls at any craft store, I got plastic ones because they will inevitably be dropped my me or my kids  You pop the top off and let you imagination soar.


For the first ornament I used Ranger alcohol inks and placed a few drops of reds and greens inside the ball and swirled it around.  


I then took the flag banner stamp for the Create your Day stamp set from Susan K. Weckesser and stamped the outside of the ball in black solvent ink.

Create your Day 1

I then took a cluster of flowers on wire stems and wrapped it around the top of the ball, attached the top, created a ribbon just under the flower cluster, and then strung it up with some beautiful gold wide ribbon from May Arts Ribbon.


For the Second ornament ball I stuffed the inside of 2 long stands of May Arts Ribbon (wide red and wide green) and tied a large bow with coordinating red and green ribbon, added the top back on, and strung it up with the same May Arts ribbon as the bow.  Could not be any easier!!


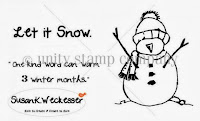
For the third ornament I heat embossed the cute little snowman stamp from Susan K. Weckesser's Let it Snow stamp set on Black Magic paper from Core'dinations.  You then sand the paper down and it creates a resist of the stamp after it has been heat embossed.  

http://www.susankweckesser.com/welcome


I then cut out the little snowman and used Stickles by Ranger in various colors and dusted him in flower soft to make it look like he is dusted in snow.


I then placed the snowman in the ball hung from the topper so it would not fall over, and filled the bottom of the ball with diamond dust so it looked like the snowman was sitting in snow.


 I then added in a flower cluster to the top along with a bow in silver ribbon for May Arts Ribbons.


Strung up the ornament with gold ribbon from May Arts Ribbon and it is done!  My little winter snowman in a ball!

.

Supplies Used
Ball Ornaments - Recollections
Ink/embossing/Stickles - Ranger
Ribbon - May Arts Ribbon
Cardstock -  Core'dinations
Stamps - Susan K. Weckesser
Flowers - Prima, Petaloo, Recollections
Diamond Dust - Flora Craft
Flower Soft - Flower Soft

Enjoy!

Susan K. Weckesser Design Team

Friday, November 29, 2013

Faith

Hi dear crafty friends! Einat Kessler here with a new project to inspire you.
This week we are celebrating Hanukkah, the holiday of light and faith. Many of my non Jewish friends have been asking me what exactly is this holiday? Well...it's a miraculous story of faith, courage and light.


The best way to tell this story is first to share with you a card I made that summarize everything you need to know. 8 burning candles and the word faith are Hanukkah in a nut shell. I created this card from bright patterned paper which I then colored with Pan Pastels in fiery colors: yellow, orange and red. Before coloring I cut 8 candles out of kraft cardstock and layered them on my card as a mask. Then I colored around them creating a white candles image.


Then I colored the cardstock candles with the same colors. I added the word faith from Susan Weckesser's Painted Sentiments stamp set and the number 8 with Susan Weckesser stencil.
I adhered the candles to the card with 3D foam tape and my card was ready!


How does the card tell the story of Hanukkah you ask? Well...here's the story...

In 175 BCE, Antiochus invaded Judea.  The second temple in Jerusalem was looted and services stopped, Judaism was outlawed. Antiochus ordered an altar to Zeus erected in the Temple. He banned circumcision and ordered pigs to be sacrificed at the altar of the temple. Antiochus's actions provoked a large-scale revolt. The Jewish revolt was successful. The Temple was liberated and rededicated, it was cleansed, a new altar was built in place of the polluted one and new holy vessels were made. Olive oil was needed for the menorah in the Temple, which was required to burn throughout the night every night. The story goes that there was only enough oil to burn for one day, yet it burned for eight days, the time needed to prepare a fresh supply of oil for the menorah. An eight-day festival was declared to commemorate this miracle - Hanukkah!


Without Faith the revolt could not have succeeded, the temple would not have been freed and God would not have given the Jews the miracle of the oil. This holiday of light was created because of the faith that darkness can be overcome!

Thanks for stopping by
Have fun creating!
Einat

Thursday, November 28, 2013

"Create your Future" by Guest Designer Tatiana Allen


Hello there, I am honored to be today's Guest Designer and can’t wait to share what Susan K. Weckesser’s products inspired me to CREATE.

Years ago I came to the realization that my brain works as, what I have labeled to be, a “visual translator.” It is almost as though the words I read or hear are of a foreign language until my brain interprets them into a visual scene.

Over time I have enjoyed bringing many of these visualizations to life through my creations, the most recent of which I will share with you today.

A while back my husband suggested I pursue my dream, to which I responded with  “when pigs fly.” Well, I am currently living that dream, as owner of a gallery and gift shop called Joyful Nest in which my studio resides.

As I looked at the supplies I had to play with, the pink Susiebee Studios Inc. “Bouquet” paper reminded me of the flying pig reference mentioned above. Then I saw her “Create” word stamp and thought of a quote that says “The best way to predict the future is to create it.” With that inspiration and that supplies listed below, my project was complete.

So, the next time you feel like your circumstances make it impossible to follow your heart and pursue your dreams, be sure to remember that anything is possible if you create it! Yes, even pigs can fly if you give them wings.

Supplies:
Susiebee Studios Inc. “Live in Color Tags” paper
Susiebee Studios Inc. “Bouquet” paper
Susan Weckesser & unity “Create your Day” stamps
Susan Weckesser & unity “Painted Sentiments” stamps
My Minds Eye “Classic Everyday Fresh Linens” paper
Westcott 6” Precision Titanium Scissors
Wing stencil
White paint
Sharpie


Wishing you smiles and sunshine,
Tatiana (A.K.A. Crafty Cutie), Susan K. Weckesser Guest Designer


Wednesday, November 27, 2013

Let it snow!


First snow fell in Korea a few days ago.
Pure white world
My heart has been cleansed.


I melted the UTEE.


Shiny Heart
Shiny Snowflake
Love this!


I used a Susan K. stamp.
WoW~ very very cute ♡
Childhood....
I made ​​a snowman.
And I cried when the snowman melted.


Snowman is shrink plastic.


Please check Christmas Love campaign.


Joyful

MIYAKE


Tuesday, November 26, 2013

Christmas Tag!

I am continuing to share the Christmas Love Campaign spirit.  I made this little tag with the products the sponsors had sent us, this is made with Fancy Pants paper, letter stickers and embellishments! The ribbon is from May Arts and of course the Susan K Weckesser Unity snowman stamp!  I love when paper manufacturers have a cover sheet with a preview of the paper that is inside, may times I have cut up that piece of paper to make a broader showing of all the papers!   Here is a piece of that paper, made into a fringe and place on the bottom of the tag.  I started off with a plain Prima tag.


After adding the fringe to the bottom of the tag I added the word snowman from letter stickers to the side of it.


Then I stamped the little snowman three times.  As you can see I changed the word from snowman at this point to snowmen! I coloured in the hat and scarf of the stamped images.


I then added ribbon and stickers to the tag.


Here is the finished product, pretty cute for such a simple tag. This will adorn someone's present this Christmas season. 


Hope you enjoyed this little tag, take care and until next time! 
Hugs Jennifer


Monday, November 25, 2013

Shabby Christmas stocking

The countdown to the big day has started and Christmas crafting has gone into overdrive in my basement workshop. One thing I absolutely had a blast creating was this canvas stocking by Canvas Corp.


With the stocking in it's raw state I used Susan's borders stencil to just add some faux cross-stitches around the border, then I hand stitched some ribbons from May Arts Ribbons around the top. 

I put Susan's little snowman onto a kraft tag and mounted it onto a burlap tag also by Canvas Corp. along with a bit of thread. I cut the frame and holly leaves from glitter card by Core'dinations and finally the stars are cut from Fancy Pants paper with the alphabet stickers coming from the same kit called "Happy go Lucky". 


Don't forget to link up your projects to the Christmas Love Campaign, we'd love to see.

See you next time

Jaine for the Susan Weckesser Design Team x

Sunday, November 24, 2013

Let It Snow Chalkboard Christmas Card

Hello and happy Sunday!  It's Lee-Anne here and today I am sharing a Christmas card that I created for the Susan K. Weckesser's Design Team.  It was so much fun to create and I wanted to try to do something a little different by creating a "chalkboard" feel to my card.  I am loving the chalkboard and sequin craze right now and also vellum as it gives a little softness to a card.

Let It Snow Chalkboard Card by Lee-Anne Thornton

Kraft Cardstock Card - Michael's
Pearlized Ink - Clearsnap (Smooch Snickerdoodle)
Ribbon - May Arts
Rubber Stamps - Hero Arts, Susan K. Weckesser (IB-SB-326)
Sequins - Unknown
Stamp Ink - Craft Smart (White)
Vellum - Recollections
Washi Tape - Bella Blvd. (Jailbird)
Wood Veneer Shapes - Studio Calico


Below are the step by step instructions to create this card:

Stamp the front of the card with three different snowflake wood mounted stamps using some white    pigment ink and let it dry.

Diecut a  small envelope from a sheet of vellum (I used my Silhouette Cameo)  and cut a piece of black card stock to measure approximately 3.5 inches by 2.5 inches.   Assemble and adhere the envelope.

Stamp the Susan K. Weckesser snowman stamp (IB-SB-326 One Of A Kind Winter) and also the "let it snow" sentiment with some white pigment ink onto a sheet of black card stock and let it dry. When it was dry,  fussy cut the snowman.

Slide the black card stock sentiment into the vellum envelope and added some gold sequins and wood veneer stars painted with some Smooch Pearlized Accent Ink.

Cut a strip of washi tape and adhere it around the bottom of the vellum envelope making sure to cut the strip long enough to seal the right hand side of the envelope.

Adhere the "chalkboard" snowman with adhesive to the righthand side of the envelope.  Be sure to offset it a little off the righthand side of the vellum envelope and adhere three wood veneer stars to the outside of the vellum envelope.  Set the vellum envelope aside.

Wrap the of gold May Arts ribbon around the front of the card and tie a bow. Make sure to have it on the lefthand side of the card so there is enough space for the vellum envelope to be placed to the righthand side of it.

Add some dimensional adhesive or pop dots to the backside of the vellum envelope and place it over the ribbon.

The card is now complete.  I hope you enjoyed this tutorial and be sure to check out Susan K. Weckesser's blog for more inspiration.  Have a creative day!


ShareThis2

BrendaPInnickColorCafe