Showing posts with label Tracy Easson. Show all posts

Tuesday, October 29, 2013

Time to say Goodbye . . .

Hi everyone, Tracy here today and I hope you will join me in a trip down memory lane, as I look back at my time on
 Susan K Weckessers first ever Design Team
with a few of my favourite things.
A Project made with my first ever stamps by
I fell head over heels for this set!!
This is now in Donna Downeys Studio for her Altered paintbrush Project.
Onto my first official project using Felt . . .
even back then I started with a plan!
To a selection of cards . . .
  Little tiny Brooches . . .
Time for tea . . .
to altered spoons . . .
from small houses to . . . 
to large wooden houses . . .
journal pages full of memories . . .
to the ones . . . just because . . .
to large plates made of clay . . .
to boats sailing away . . . 
over the deep blue sea . . .
to one of my all time favourites - a mixed media book to chase the blues away.
You can see more pics of this one by clicking HERE.
 The back of the mini book sums it all up 
Create Your Day and be Happy
that is what I would wish for Susan, Cheryl and all the Design Team members past and present and I hope you will all stay in touch, I can`t wait to see what you all create!!

Susan thank you from the bottom of my heart for picking me to be part of your first ever design team, I will never forget the feeling I had when I opened that email . . . woohoohooo . . . I am sure everyone on the street could hear me jumping up and down, running around screaming, lol!
What an AMAZING journey it has been and a pleasure getting to know you and the rest of the girls, I sure have found some wonderful friends, so thank you!
Good luck to the new team and woohoo let the your journey begin . . . .
Big hugs
Susan K Weckesser Design Team Member.

Tuesday, October 22, 2013

Create Your Day . . .

 Hi everyone, Tracy here today with a journal entry to share with you all using . . . 
along with
Pan Pastels
My Minds Eye - The Sweetest Thing Papers.
For those of you who don`t know me, I live in Scotland where . . .
Up on the hills on a Scottish Summers rainy day,
when the fields are all in bloom,
 verges are scattered with wild roaming flowers
and then
the sun tries to push it`s way through the clouds
to cover everything in a golden glow . . .
It`s a sight to behold I promise you!
I used 3 sheets of MME papers from the collection to create-
 the wildflowers, the fields of rapeseed and finishing with the sky.
Next up it was time for some stamping, snipping out the shapes and fixing in place with a little Maimeri Matt Gel Medium.
Ohhhhh, I doodled the little Bee Hive up above with the busy buzzing bees and snipped out a fence from more paper.
 Next out came the Pan Pastels, followed by a little doodle doodle doo with a fine black liner pen.
But it wasn`t finished yet . . .
 . . . I do like to keep a note of all the products I have used to pop it altogether, just incase I want to re create it onto a canvas.
Here`s a photo of the finished pages and I hope you like my little touch of Scotland!
Well that`s it for me today
Thank you so much for taking the time to look.
Till next time
Happy Crafting
Tracy Easson
Susan K Weckesser Design Team Member

Wednesday, October 2, 2013

Remember . . . The Windy City that was mighty pretty?

Hi everyone, Tracy here today with a little more wood Art . . .
 . . . remember this journal entry that I created back in August with 
from the
Purpose Of Art stamp set 
that Susan designed for Studio 12 for Polkadoodles in the UK . . .
 well I thought it was about time I put the idea onto some of that wood I have in a pile in my shed.
I have used a few different products on the wood but other than that it`s just the same.
A quick coat of Maimeri Gesso followed by a little Phthalo Blue Shade Pan Pastel mixed with a little of the Gesso for the background. I didn`t get a clean stamped image, but that`s easy sorted later with a fine liner pen and a few doodle, doodle, doo`s.
I used a combination of Pan Pastels and Water color paints.
Before . . .
. . . Stamping  the image again, snipping a few buildings and clouds out before coloring and fixing in place with Maimeri Matt Medium.
 Following the sky up and over the top along with a little doodled sentiment and Heart.
A few splars of paint, a quick run over with a clear embossing pad, a sprinkling of clear embossing powder set with the heat tool to finish.
It may be only a little chunk of wood, but the do make me HAPPY!
Well that`s all from me today except to say
Thank you so much for taking the time to look
Till next time
Happy crafting!
Toodiloo
Susan K Weckesser Design Team Member

Wednesday, September 4, 2013

Heart and Home . . .

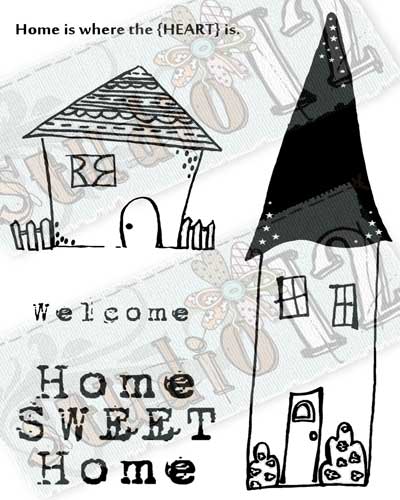
 Hi everyone, Tracy here today and I`m sooo excited to be sharing my little mixed media altered heart with you all using one of the house stamps and sentiments

 that Susan has designed for Studio 12, which is available to order in the the UK from Polkadoodles, woohoo!
Just how cute are these houses . . . yummy!!!

Sooo once again I found myself sitting in my shed, gazing out the window onto a typical Scottish day . . . grey and misty!
Now . . .  if you have ever visited Scotland you will know that even on the greyest of days the landscape is truly magnificent and a sight to behold. 
{ guess I am a tad biased,haha }
 Here are a few supplies and how the heart looked before I started to get messy!
I wanted a grey misty feel surrounding the stamped image, so out came my Pan Pastels blending a few colors together with the tools until I was happy.
Next, time to ink up that stamp with Archival ink and get stamping.
Stamp the image again onto card and snip parts out before using 3d foam pads to make it pop!
 A few little strokes of Pan Pastels for color,a little doodling along the way and finishing with a quick sprinkle of embossing powder for some texture and shine.
The perfect sentiment to go along with my altered heart . . . stamped and snipped . . .
. . . and no home would be complete without the key to our Hearts!
Well that`s all from me today
Thanks again for looking
Till next time Happy Crafting!
Tracy Easson
Susan K Weckesser Design Team Member

Wednesday, August 28, 2013

Oh the windy city is mighty pretty . . .

 Hi everyone, Tracy here today and I`m sooo excited to be sharing a journal page with you all using the
 from the
that Susan designed for Studio 12 which is available in the UK from Polkadoodles, woohoo!

So I was sitting in my shed thinking about my youngest, who has just moved to the big City to live, to attend University when I SPIED this stamp and my brain started to tick, tick, tick . . . .
 . . . it`s as if it was just sitting waiting on this day to arrive!

Out came my old second hand book, a few paints and Distress Stains and I was off . . .

. . . okay I admit I got carried away so no step by steps, but it is soooo easy to re create!

Just ink up the stamp with an Archival ink pad, stamp straight onto your chosen journal and again on a loose sheet of paper.
 I used a mixture of watercolors and Distress Stains to color the background and images before splattering with a little water and Distress Stains.
 To add a little dimension I snipped out a few buildings from the extra sheet, before fixing in place with foam pads.

Now if you know me, you will know by now I looove to scribble and doodle doodle dooo
 . . .soooo . . .
 . . . out with a fine black liner pen and away I went adding a little along the way.
Here`s a look at the opposite page which I looove to use to keep a record of all the products.
 Well that`s all from me today.
Thank you for looking.
Till next time
Happy crafting friends!!

Susan K Weckesser Design Team Member

Wednesday, August 7, 2013

Birds of a feather with Susan K Weckesser/Studio 12

 Hi everyone, Tracy here today to share a quick project using 
one of the stamp sets that Susan K Weckesser designed for Studio 12 over at Polkadoodles and is available in the UK, woohoo!
It`s a cutie.
I will apologise in advance as I don`t have any step by step pictures today, but this is super easy to recreate, promise.
 Just start with a quick layer of Gesso over an off cut of wood, leave to dry or if you are impatient like me ... then blast it with your heat tool.
 Get out your Pan Pastels in 2 colors and apply all over the block of wood, apply some white Pan Pastel next and finish with a little Black Pan Pastel around the edges.
 Time to ink up the stamp using an Archival ink pad and color with Watercolor paints. To add more definition I went around the outline with a black liner pen, adding a few doodles along the way.
 Stamp the little birdie a second time and cut out the wing to make it look more 3D.
 Next I stamped the sentiment onto card, chopped it up and applied a little Walnut Stain Distress Ink with a blending tool around the edges.
I fixed them in place with a hot glue gun and added a few more doodles.
Can you see the text on the left . . . I applied Pan Pastel to a script stamp that I won from  
Unity Stamp Co recently { woohoo}and  randomly stamped it over the block of wood.
To finish a touch of a Clear Embossing pad followed by some Cosmic Shimmer Embossing powder for a little touch of texture.
Thank you so much for taking the time to look.
Till next time
Happy Crafting
Susan K Weckesser Design Team Member

ShareThis2

BrendaPInnickColorCafe