Showing posts with label cards. Show all posts

Monday, November 28, 2016

Stamping on vellum card tutorial with Irit


Hello my dear crafty friends and welcome to my last November tutorial made for Susan K Weckesser blog.
I didn't make step by step photos this time, so it's just the step that you can do to make this fancy card.
1. Make the basic card with stitched rectangle die and Susan's Live in color cardstock.(Use the back side for this card)
Add another layer die cut in smaller size using Susan's Colorburst cardstock.(Use back side again)
2. Die cut the third rectangle and die cut the honeycomb using Sizzix die. Glue the die cut layer as your third layer.
3.Make yellow cardstock matting and the diagonal cardstock layer and glue them over the first three layers.
4. Stamp the Susan's co- branded with Unity sentiment from In my garden stamp set with black pigmented ink and heat emboss with clear powder. Die cut the sentiment and make a yellow circled matting using Die Versions stitched nested dies. Glue the sentiment over the card as shown.
5. Stamp the big flowers over clear vellum from the same stamp set in the same way and hand cut them. Color the flowers with Susan's inks from Clearsnap using them as water colors (Kiss, Fresh and Snow).
Glue the flowers with clear glaze and cover them with a  glaze layer.
6. Add some rhinestones and three yellow circles around the card. Make faux stitching as shown with black pen.


Sunday, September 25, 2016

Happy Thoughts Card

First of all - so sorry my post is late today! Things are a bit hectic at chez Katy. Anyway, I digress... This month we are making cards on Creative Team. Now I don't make an awful lot of cards generally but I do like to make ATCs - and they make great toppers for a clean card design.

To create my ATC I used white embossing paste through a stencil and added silver gilding wax over the top. I added a piece of doily, a strip of patterned paper, a scrap of crochet ribbon, some printed words and some buttons, all in tones of white and cream. I edged the ATC with black ink.


The Unicorn (from the Unicorn and Rainbows set) is lightly coloured in greys with a pop of pink added to make it stand out from the background.

To finish I matted to a card blank edged with black ink.

Hope your thoughts are happy ones today!

Katy x


Friday, September 23, 2016

Love Is in the Details....

Sometimes a card is not fancy.

Sometimes it is just made especially for someone you love.

My daughter is away.

We miss her like crazy.

I made this card for her.


I wrapped the card stock behind the stamped piece with vintage string.


This stamp was perfect for what I am feeling...


I will be dropping this in the mail soon this week...


She loves to get snail mail...


Make a card for someone you love....


Stamps from Heart-FULL Homes stamp set


Brooke Bock, Susan K. Weckesser Design Team 2016

Saturday, September 10, 2016

"Friends Forever" Friendship Card


Hi Crafty Friends!  Joyce Shaulis here today sharing a quick and easy friendship card with you using Susan K. Weckesser's fabulous ink, stamps, and scrapbook paper. 

This week I had the wonderful opportunity to spend the day with my two best friends that I've known since elementary school.  I won't tell you how many years that's been, but we did the math and it's a lot!!!  For this card, I used a photo of myself with my one friend from 1982.  I will be happy to send her this card as we cherish our years of memories. 


To start, I made a card using light yellow cardstock measuring 5 1/2" x 4 1/4" when folded.  Then, I cut a piece of the "Live in Color" scrapbook paper 5" x 4", using the green back side.  Then, I cut out two flowers from the same paper from the front. 


Next, I stamped with Mystery mini POP ink and quotes from the Insta-Cute stamp set onto yellow cardstock. I also stamped the framed image onto light yellow cardstock, also with Mystery.  Then I cut these images out and edged them with Mystery ink. 


I then edged the two flowers, the card, and the green background piece with Mystery ink. 


I copied my original photo and cut it to size to fit in the desired place.  I glued each layer down using mini glue dots.  I also cut tiny flowers from the "Live in Color" paper and edged them in Mystery.  I attached those with mini glue dots also.  I added an additional sentiment inside the card. 


Thank you for allowing me to share my friendship memory and card with you today.  Be sure to share a card, a call, or a special gift with a good friend today.  Friendships are a true treasure. 
 
 
Susan K. Weckesser products:
 
"Live in Color" scrapbook paper
Mini POP inks - Mystery  https://www.clearsnap.com/
Insta-Cute rubber stamp set https://www.unitystampco.com/
 
Other products:
 
Mini Glue Dots http://www.gluedots.com
Yellow and light yellow cardstock
Copy of a personal photo
 
Joyce Shaulis       Susan K. Weckesser Design Team Member


Monday, September 5, 2016

Friends Card


Hello friends - Katy here today and I am sharing a mixed media card using the adorable owl from Susan's Going Wild stamp set for Unity. The team are making cards this month with a friendship theme, so I combined the owl with a heart motif.

I actually created this card from digging around in my scraps box. The background is made from card that's been dipped into Distress Sprays and water smooshed onto a craft mat and is leftover from a bigger project. I added a stencilled border with the Doodle stencil to give it some additional detail.

The heart has been embossed through a Big Shot and then is painted with ColourArte Silks in Teal Zircon - this has a gorgeous shimmer. The heart was a reject from another previous project. I inked the edges to make it pop a bit more from the background.

I coloured my owl to match and finished with a flower from - you guessed it! - my scraps box and a word sticker.

All of which proves you should never throw anything away (despite what your husband might say!).

Hope you like my little card!
Katy x

Susan K Weckesser products used:


Thursday, July 14, 2016

Pinwheel House

This is my first project as part of the Susan Weckesser design team.  I am in LOVE with her paper!  It is a wonderful thickness and has many designs on one piece of paper so you have options for how to use it.  I adored the stamping ink also.  For this card, I used the stencil...which is also great since you get so many different stencils in one.


Details:
  1. Card Base:  Bazzill cardstock - Blue, 4.25 x 4.25, folded at the top.  Edge design created with a tan gel pen.
  2. First Layer:  Color Burst paper, Doodle stencil, Color Pop Mini - Sky, Sharpie (flower center).
  3. Second Layer: Color Burst paper (opposite side), Color Pop Mini - Fresh.
  4. Image:  Live in Color Tags paper, Color Pop Mini - Fresh, Doodle stencil, Color Pop Mini - Sky, Ivory flat back gems.  This is only attached in the middle to give dimension.
  5. Pinwheel:  Color Burst paper, green flat back gem.
Susan K. Weckesser Design Team Member


Thursday, May 12, 2016

It's An INKY Feast For the Senses!

It was  my pleasure to be one of the first people to use and review the new Susan K. Weckesser inks by Clearsnap: ColorBox Color Pop Minis 

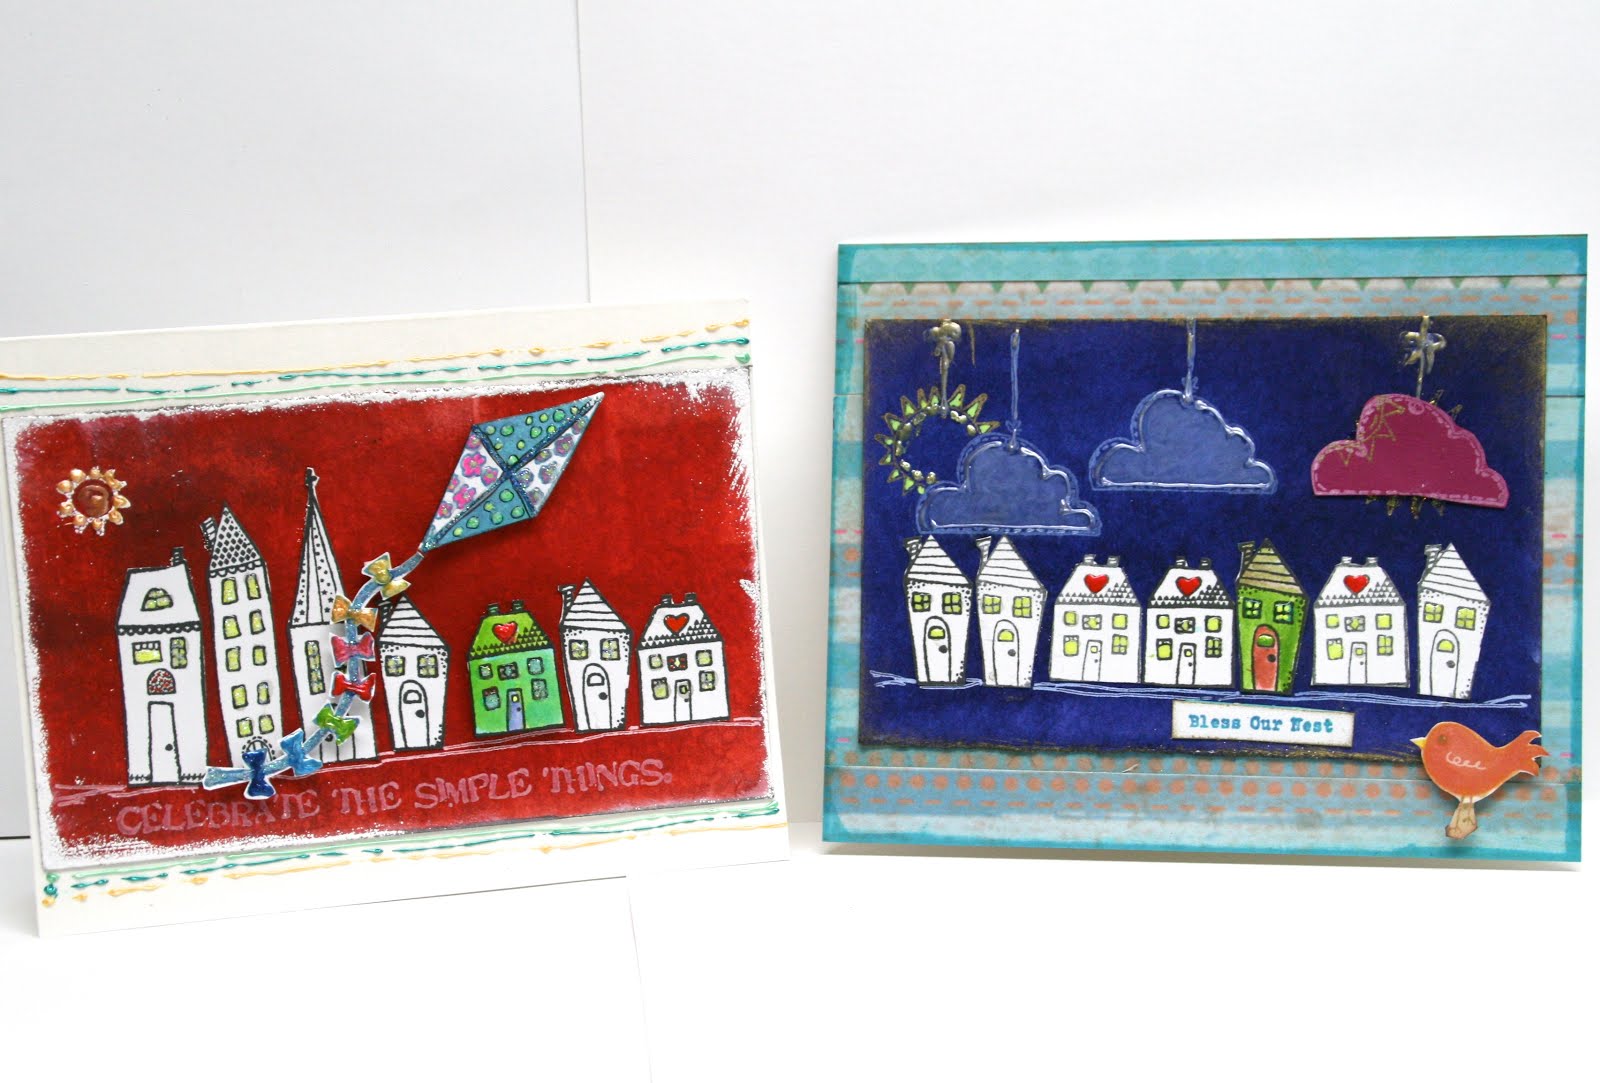
Here are the two cards I created using these inks...

And here is my review
I LOVE them!  Grin 

These are all the things I love about these inks:
The 1"x2" size is perfect, small enough to easily have within reach but large enough to handle most stamping jobs.  The Lid fits snugly so the ink won't dry out and it does not come off when I throw them in a basket (which is my usual modus operandi).
The dye ink colors are vibrant, both when they go on and when they have dried (not always the case with some inks) and they blend beautifully with water - again without fading!
The pigment ink is thick and opaque, just the way I like it, and takes a while to dry unless you use your heat gun - all Good qualities in a pigment inkBut the Metallic ink... Swoon!  Seriously, the best metallic, pigment ink I have come across to date and I have used a LOT of them!  This ink dries metallic and looks like I used metallic paint - which is what I have resorted to since I have been unable to find a metallic ink that still looks like metal after it has dried - that is until NOW!
And now for the fun stuff.  Because I was trying out a new product I wanted to use these inks in a few different ways and I took photos along the way so you could join in... I hope you enjoy this mini card class and a peek into my creative process.
 
I decided to ink the background of my cards and then use the white pigment ink to stamp right onto the dark background.  For me THIS is the true test of a both a dark dye ink and a white pigment ink.  will the dark ink stay dark?  And will the white ink be opaque enough to show up and not fade away?
Not only did both inks pass, but I needed very little of the dark blue ink to create a wash on my background... I used way too much! Grin
Then I stamped right onto my background (after the ink had dried of course) with white and gold pigment ink.  I used a masking technique to make the sun appear as if it was coming out from behind the clouds.
You can see how the pigment inks stay crisp and bright and how the background ink is still dark even after drying.  Then I did something CRAZY!  I used water with my white pigment ink and added a light wash to the clouds... This NEVER works for me with pigment inks and yet here it is!!
Then I stamped a whole bunch of tiny house images onto white 100lbs card stock, grabbed my water brush and started painting in the houses. I used Archival waterproof ink for this part since I knew I wanted to get my images wetThese dye inks acted like a watercolor paint and blended beautifully.  They worked so well I went and grabbed another of my ColorBox dye inks in yellow, (Not the mini pops 'cuz NO yellow) and it did not work at all!  So this confirms for me that all inks are NOT created equally!
And then I did the same sort of things for the second card in Red...
 
The rest of the photos are all about design and embellishing... using my very favorite techniques of fussy cutting and popping the images, and then using gel pens and Stickles & Liquid Pearls to enhance the card.
Then of course you have to mount the card image onto a card base...

What I love the most about these two cards is how the ink stayed dark and vibrant so the white, un-coloured houses I stamped just jump right off the page... but then that one coloured house becomes the focal point... 
Yup... Great product and wonderful inks. My one suggestion, MORE Metallic Colors and I NEED a yellow dye ink! Grin
for the Susan K. Weckesser
 
The following are a list of stamp sets and products I used for these two "simple" cards... (She says Grinning Madly!)

Susan K. Weckesser/Unity Stamp Sets Used on this Project:
Create Your Day
Celebration of Simple
Tumbleweed Houses
Fly Away
SKW Cardstock - Beautiful Day Dreams
 
ColorBox Color Pop Mini inks
Ranger Stickles and Liquid Pearls
Sakura Gelly Roll Pens
Tsukineko Clear Embossing Powder


ShareThis2

BrendaPInnickColorCafe