Showing posts with label Christmas #craftuplove. Show all posts

Thursday, December 18, 2014

"Let it Snow" Puzzle Cards

For Christmas this year we decided to give a trip for our kids and not gifts, so to reveal this fun present to our kids we had them each open 3 presents (the cards below) with clues of where we were going, so 9 clues total were opened at an early Christmas present opening with my parents.  On each card I wrote a portion of a sentence giving a clue of where we were going.  It reads, "For this Christmas our present to all of you is to spend our time together having fun and lots of cheer.  So bring your magic and your swim suits for we are going to a very special place full of lots of wonder and joy."  


On the back side of the cards were numbers stating which row the card was in (to make it a bit easier) and a letter or two that they had to arrange to spell the words "Great Wolf Lodge".  The screams of excitement were deafening as they figured out where we were going.


The cards each measure 4 x 4 inches, so once together it creates a 12 x 12 page.  The colors of the papers and the cute diecuts were just perfect for this little project!!


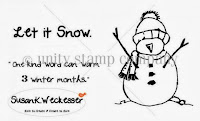
For some of the cards I used the super cute "Let it Snow" stamp set from Susan K. Weckesser.  The snowman and phrase were just a perfect fit for these papers.


http://susankweckesser.com/design_team

So even thought there are not true presents to be opened this year, our trip is worth so many more memories than any toy can give.

Supplies used
Cardstock - Bazzill - Dec Birds of a Feather Kit
Pattern Papers - BoBunny - Dec Birds of a Feather Kit
Diecuts - BoBunny - Dec Birds of a Feather Kit
Stamps - Susan K. Weckesser
Ink-  Ranger
Pen - Faber-Castell

Monday, December 23, 2013

Merry Christmas Card

Every year I love to hand make Christmas cards, some I make quick and easy and some I spend more time on, it really depends on who I am giving them to knowing if they will keep them or not.  My mother and mother in Law always keep the cards, tags, and such that I make so I love giving them my special ones.


Here to went with a monotone color scheme, green.  I then added in colors of beige, gold, and grey to match with the papers I was using.  I wanted to give lots of texture, so I added in the wonder burlap tag by Canvas Corps in my layers, plus some corrugated paper from Fancy Pants in grey.  I then added in lots of layers of patterned paper for even more depth and dimension.


I wanted to add something more behind that back drop of the "Merry" word, but more have it ass bulk - enter in stamps!!  I stamped the wonderful flag banner stamp from the "Create you Day" collection from Susan K. Weckesser stamped in gold by Ranger.  It added that perfect pop and texture needed!!

http://www.susankweckesser.com/susan_k_weckesser_incproducts 

 To round it all off I added some leaves, flowers, and a die cut ornament to finish the card.  It does add bulk and dimension, but standing up on a mantle or a table with other Christmas cards this sure does stand out!


 Merry Christmas!!

Supplies Used and can be purchased from Flamingo Scraps
Patterned Paper - Basic Grey
Die Cuts - Basic Grey
Flowers and Leaves - Prima and Maya Road
Acrylic word - Heidi Swapp


Design Team Member for Susan K. Weckesser

Saturday, November 30, 2013

Ball Ornament Trio

I keep seeing all these cute little ornaments everywhere, glass or plastic balls that are hollow, spherical just begging to be filled with something.  So I did!

Here is the trio I made using lots of items from Ranger, Core'dinations, May Arts ribbons, and of course Susan K. Weckesser stamps!!


 You can find these spherical ornament balls at any craft store, I got plastic ones because they will inevitably be dropped my me or my kids  You pop the top off and let you imagination soar.


For the first ornament I used Ranger alcohol inks and placed a few drops of reds and greens inside the ball and swirled it around.  


I then took the flag banner stamp for the Create your Day stamp set from Susan K. Weckesser and stamped the outside of the ball in black solvent ink.

Create your Day 1

I then took a cluster of flowers on wire stems and wrapped it around the top of the ball, attached the top, created a ribbon just under the flower cluster, and then strung it up with some beautiful gold wide ribbon from May Arts Ribbon.


For the Second ornament ball I stuffed the inside of 2 long stands of May Arts Ribbon (wide red and wide green) and tied a large bow with coordinating red and green ribbon, added the top back on, and strung it up with the same May Arts ribbon as the bow.  Could not be any easier!!


For the third ornament I heat embossed the cute little snowman stamp from Susan K. Weckesser's Let it Snow stamp set on Black Magic paper from Core'dinations.  You then sand the paper down and it creates a resist of the stamp after it has been heat embossed.  

http://www.susankweckesser.com/welcome


I then cut out the little snowman and used Stickles by Ranger in various colors and dusted him in flower soft to make it look like he is dusted in snow.


I then placed the snowman in the ball hung from the topper so it would not fall over, and filled the bottom of the ball with diamond dust so it looked like the snowman was sitting in snow.


 I then added in a flower cluster to the top along with a bow in silver ribbon for May Arts Ribbons.


Strung up the ornament with gold ribbon from May Arts Ribbon and it is done!  My little winter snowman in a ball!

.

Supplies Used
Ball Ornaments - Recollections
Ink/embossing/Stickles - Ranger
Ribbon - May Arts Ribbon
Cardstock -  Core'dinations
Stamps - Susan K. Weckesser
Flowers - Prima, Petaloo, Recollections
Diamond Dust - Flora Craft
Flower Soft - Flower Soft

Enjoy!

Susan K. Weckesser Design Team

Thursday, November 7, 2013

Hand-Made Painted Christmas Stocking

Hand Made Christmas with dates_thumb[6]
It is finally time for the 5th Annual Christmas Love Campaign with Susan K Weckesser Inc.
  This is such a special cause and I hope you will participate with us this year.   To jumpstart everyone with some inspiration, the designers at Susan K Weckesser Inc  are celebrating a Handmade Christmas from Nov 2-16,  and sharing projects handmade in honor of this campaign.   We were provided a great selection of products to work with by some amazingly generous sponsors.  Thank you to our sponsors.
Here are the wonderful sponsors for the 2013 Susan K. Weckesser Inc. Handmade Christmas:
35201_145433302136537_6844468_n 553360_455467244502874_612663717_n ma

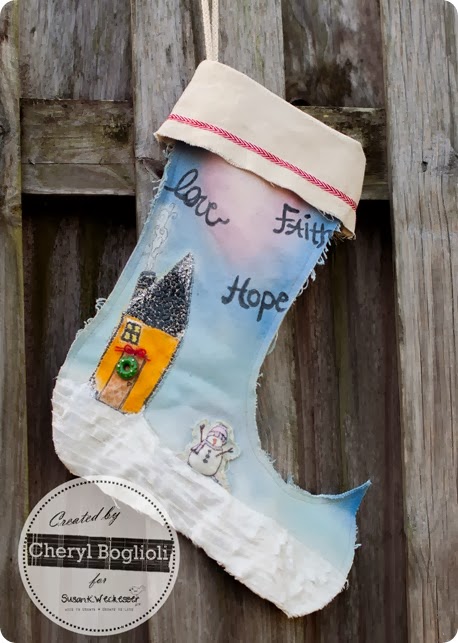
I used products by Susan K Weckesser & Unity, Canvas Corp, Tattered Angels, & May Arts Ribbon for my project and created a hand-painted Christmas stocking.
CherylBoglioli_CanvasCorp_SKWInc_stocking-4-2
Canvas Corp has a few different stockings in raw canvas and burlap.  I love the natural look of canvas and burlap for Christmas decorations.  I decided to paint my stocking with PanPastel
CherylBoglioli_CanvasCorp_SKWInc_stocking-8
Before coloring the stocking, I stamped the main images I wanted to use on masking paper and cut the images out to protect the surface I did not want colored. 
CherylBoglioli_CanvasCorp_SKWInc_stocking-2-2
After applying the making paper to my stocking, I colored the stocking with PanPastel colors blending them to create a nice soft background.  Using the Sofft sponges, I was able to keep applying color, pouncing it into the raw canvas and blending.
CherylBoglioli_CanvasCorp_SKWInc_stocking-6-2
I then stamped the house and embossed with Ultra-High Ebony WOW embossing powder and then colored the house using more PanPastel and a little white acrylic paint for extra snow!   The PanPastel was sealed using Helmar Matte varnish Krystal Kote.
The snowman stamp is a special stamp we use during the Christmas Campaign.  Isn’t he adorable.  Each purchase of this stamp will donate $3 toward the Christmas Love Campaign.  Here is a direct link so you can buy your One of a Kind Winter at Unity Stamp Co.
CherylBoglioli_CanvasCorp_SKWInc_stocking-3-2
CherylBoglioli_CanvasCorp_SKWInc_stocking-5-2
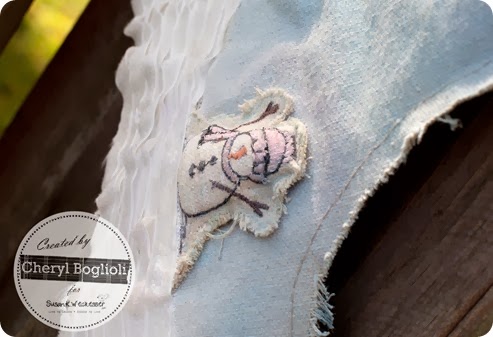
Instead of stamping the snowman directly on the stocking, I changed my mind and decided to make him 3D.  So I stamped him on some Canvas Corp raw canvas and stitched his outline in black and then came back with basic zig-zag stitches and colored thread for his arms, nose, hat, and scarf.  I doubled some canvas and roughly stitched around him to create his basic shape and then stuffed him.   My little 3D puffy snowman was then glued to the stocking. 
I decided I wanted more sparkly snow, so I glued layers of May Arts ribbon as a snow base.   I also sewed another strip of May Arts ribbon around the stocking cuff.  The house was finished off with a little wreath charm from my Prima Bead ‘Tis the Season’ collection and the stocking received a final mist of Chalkboard Mist by Tattered Angels
I hope you are inspired to create your own Hand-Made Christmas this year.  To further encourage you, how about entering your Hand-Made Christmas project in our Hand-Made Christmas Contest?
HAND-MADE CHRISTMAS CONTEST
To start off this wonderful year 5th year of the Christmas Love Campaign, we are having a Hand-made Christmas Contest.
What you have to do:
*Follow along during our Hand-made Christmas event from November 2 - November 16, 2013 at Susan K Weckesser Inc blog 
*Like the Christmas Love Campaign Facebook page ---> HERE.
*Make your own Hand-Made gift. (it can be something you designed yourself or if you want try something that the designers have created please go ahead and have fun and do that!)
*Take a picture and post it on our Facebook page. Or if you have Instagram post it there and tag it #craftuplove , #christlovecampaign & #susankweckesserinc so I see it! You can find me @ [SUSANKWECKESSER] on Instagram, so come follow me and I would LOVE to follow you! So much fun!
*Give your gift to a neighbour or stranger to make them smile! SPREAD THE LOVE!
*Come back to our Hand-Made Christmas post and let us know that you have crafted up some love and you will be entered to win a awesome prize pack from the above sponsors. The prize will include lots of goodies so you can craft up more love! How awesome is that! You have until November 17, 2013 at midnight MST to enter. Have fun!
Thanks for joining us!
postimage


Cheryl Boglioli
Design Team Coordinator

Wednesday, November 6, 2013

Christmas Love Stocking and a Hand-Made Christmas Contest!


Hi!  Susie here and I am so excited to be joining the Susan K. Weckesser DT just in time for the 
We are celebrating a Hand-Made Christmas and my fun and easy-to-create project today is...


...a Christmas Stocking!


I started working on the cuff of the Canvas Corp. stocking, applying large alpha stickers from Fancy Pants, then brushing on  a coat of gesso.


 Once the gesso dried, I removed the letter "O" sticker and sprayed with Ferrari Red Chalkboard Glimmer Mist from Tattered Angels.I used a paintbrush to make sure the "O" was really saturated.


When that dried, I removed the remaining stickers to reveal the canvas below. I used a black pen to outline the letters and fashioned a bow with chevron striped ribbon from May Arts.


I used the same technique to create most of the lettering on the body of the stocking - I just used smaller stickers!  Later on, I also outlined these smaller letters with a black pen.
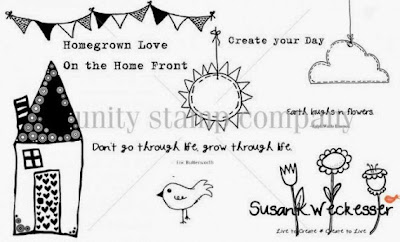
The word "home" was stamped using Susan K. Weckesser's Little Haven stamp set from Unity. 

 I stamped  the large house, also from the Little Haven set, and heat embossed with white embossing powder before "painting" it with watered down Distress Ink.
I wanted it to be a very soft image that faded into the background.  The door of the house was painted with the watered down Ferrari Red Chalkboard Spray.

The last thing I added was the snow man from the One of a Kind Winter set from Unity. 
He was stamped with black ink and colored a little more boldly so that he appears very much in the foreground.  Now the stocking is ready to be filled with another hand-made treat - maybe Christmas cookies?!


HAND-MADE CHRISTMAS CONTEST
To start off this wonderful year 5th year of the Christmas Love Campaign, we are having a Hand-made Christmas Contest.

What you have to do:

*Follow along during our Hand-made Christmas event from November 2 - November 16, 2013 at Susan K Weckesser Inc blog 
*Like the Christmas Love Campaign Facebook page ---> HERE.

*Make your own Hand-Made gift. (it can be something you designed yourself or if you want try something that the designers have created please go ahead and have fun and do that!)

*Take a picture and post it on our facebook page. Or if you have Instagram post it there and tag it #craftuplove , #christmaslovecampaign & #susankweckesserinc so I see it! You can find me @ [SUSANKWECKESSER] on Instagram, so come follow me and I would LOVE to follow you! So much fun!

*Give your gift to a neighbour or stranger to make them smile! SPREAD THE LOVE!

*Come back to our Hand-Made Christmas post and let us know that you have crafted up some love and you will be entered to win a awesome prize pack from the above sponsors. The prize will include lots of goodies so you can craft up more love! How awesome is that! You have until November 17, 2013 at midnight MST to enter. Have fun!

COME & JOIN US!

Thanks for stopping by and I hope you find some time to play today!
Susan K. Weckesser Design Team Member 

Supply List:


Tuesday, November 5, 2013

Paper Cone Christmas Tree - Christmas Love Campaign


I love the idea of the Christmas Love Campaign that Susan K. Weckesser is hosting, it is such a wonderful idea to create a gift for someone you love or even a stranger!!

Here is my project to share with you – coming from our wonderful sponsors Ranger, Fancy Pants Designs, MayArts Ribbon, Canvas Corp, Core’dinations, and more.

I wanted to create something that would stand out, something that could be a center piece, rest on a mantle, or a hall table, and not just another ornament.   So I searched around and found this cute idea of rolling paper into cones and making a tree out of them. 


I used a paper towel roll as the center of the tree, it is about 11 inches long, but you could create taller ones with wrapping paper tubes, cutting them down to any length you want.  I then took the Black Magic and Brights cardstock from Core’dinaions (along with their sanding tool and dust collector to create the distressed papers) and patterned paper from Fancy Pants Designs and Canvas Corps to create the cones for the “leaves” of the tree.  


  I used both adhesive and tape to hold the cones together.  First you use a square size paper (the bottom row is a 6x6 size, then 2 layers of 5x5, then one layer each of 4x4, 3x3, then lastly 2x2), then roll them into each other to create the cone seen above.  You then tape each cone to the paper towel roll (start about 2 inches up from the bottom of the roll).  Start taping all the way around the tube (took me about 8-11 cones per row – smaller cones take more), to create layers for your tree.


After the entire tree was covered with cones I sprayed some Tattered Angels Chalkboard mist in Ferrari Red to cover up the insides of the cones that were not red or green and to give it more of a shabby chic look.  I used a Susan K. Weckesser Stamp to create the little balls hanging from the tree.  I stamped on green paper, punched out the circles with ornament shaped punch, inked the edges with black ink, and attached them to the edged of the tree with little jingle bell brads.


 For the tree topper I created a pom-pom by winding the fibers in red and green (from Canvas Corps and May Arts Ribbons) around a U shaped tool (seen below) many times around, about 100.  
 

You then tie it around the center in a knot to hold it together, and then cut the loops at the end to create a pom-pom.  I tied a bow on the front for a bit more fun!!


 I hope you enjoyed my little tree - now to decided who is getting it :)
I hope this has inspired you to create for the Christmas Love Campaign and create a little gift for someone!
We hope you will join us for our HAND-MADE Christmas Contest, so keep reading.

HAND-MADE CHRISTMAS CONTEST
To start off this wonderful year 5th year of the Christmas Love Campaign, we are having a Hand-made Christmas Contest.

What you have to do:

*Follow along during our Hand-made Christmas event from November 2 - November 16, 2013 at Susan K Weckesser Inc blog 
*Like the Christmas Love Campaign Facebook page ---> HERE.

*Make your own Hand-Made gift. (it can be something you designed yourself or if you want try something that the designers have created please go ahead and have fun and do that!)

*Take a picture and post it on our facebook page. Or if you have Instagram post it there and tag it #craftuplove , #christmaslovecampaign & #susankweckesserinc so I see it! You can find me @ [SUSANKWECKESSER] on Instagram, so come follow me and I would LOVE to follow you! So much fun!

*Give your gift to a neighbour or stranger to make them smile! SPREAD THE LOVE!

*Come back to our Hand-Made Christmas post and let us know that you have crafted up some love and you will be entered to win a awesome prize pack from the above sponsors. The prize will include lots of goodies so you can craft up more love! How awesome is that! You have until November 17, 2013 at midnight MST to enter. Have fun!

COME & JOIN US!

Enjoy!!
http://scraps-of-reflections.blogspot.com/
 Susan K. Weckesser DT Member


ShareThis2

BrendaPInnickColorCafe