Showing posts with label Canvas Corp. Show all posts

Thursday, December 4, 2014

Let It Snow Tag


Hi! Dana Tatar here today sharing a frosty tag that I created with Susan K. Weckesser patterned paper and stamps and some lovely products from The Crafter's Workshop, Canvas Corp, UmWow Studio and Prima.


I started with a piece of Beautiful Daydreams patterned paper and cut it down to the size of a standard shipping tag. I then cut circles from the Color Burst patterned paper and glued them randomly to the striped tag. I used The Crafter's Workshop Mini Folk Art Flower with Martha Stewart Sparkle Texture Effect to create the large "snowflake" pattern on the base of the tag.


I used the Susan K. Weckesser One of a Kind Winter Stamp Set to stamp the "Let it" portion of the sentiment. The letters for the word "SNOW" were cut from a piece of Live, Love, Create patterned paper. I outlined the letters with a white gel pen and topped the "O" with flowers. The chipboard is from UmWow Studio. I colored it lightly with acrylic paint, dabbing the color on with my fingers.


I finished the tag with floral trim, lace and adhesive pearls.

http://www.unitystampco.com/shop/one-of-a-kind-winter-christmas-campaign/ https://www.etsy.com/listing/84732887/live-in-color-scrapbook-paper-collection?ref=shop_home_active_1

Thanks for stopping by today!
~Dana Tatar - Susan K. Weckesser Designer

Tuesday, November 11, 2014

Home Pennant


Hi! Dana here today sharing a canvas pennant that I created for my home. I'm an Air Force wife and move around a lot. My husband and I always tell our daughters that as long as we are together we are home. I started with a blank Canvas Corp Canvas Pennant and some Canvas Corp Rope and then added color with paint, stamps and Susan K. Weckesser patterned paper.


I used the Fly Away and Tumbleweed Houses stamp sets for the sun, cloud, the word "home," and the small house (below).


I colored the canvas with white, blue and pink acrylic paints. I added small circles of color using Yellow Clearsnap Smooch with a stencil and a white gel pen. I embellished several areas of the pennant with flowers and glass gems.


I stamped, cut and colored a small house to add to the bottom of this piece.

https://www.etsy.com/listing/84732887/live-in-color-scrapbook-paper-collection?ref=shop_home_active_1 http://www.unitystampco.com/shop/fly-away/ http://www.unitystampco.com/shop/tumbleweed-houses/

Thanks for stopping by today!
~Dana Tatar - Susan K. Weckesser Designer

Monday, September 29, 2014

Autumn Create to Live Challenge - Mother Card


Hi Susan K. Weckesser fans! Dana here today sharing a card that I created for the Autumn Create to Live Challenge. I combined patterned paper and cardstock from our partners Canvas Corp and Core'dinations with the Susan K. Weckesser Motherhood is a Verb Stamp and some vintage embellishments for this card. I was inspired by the challenge inspiration block for the colors and theme of this greeting.


I stamped the image with Archival Ink and then added color with Distress Markers. I loved the spool of thread, pins, button and doily from the inspiration block, so I framed the image with those items.


We'd love for you to share your project based on the picture above. Write a blog post and link-up your project to the challenge submission on our sidebar to the left. After you post your project, make sure to tweet about it, share it on Facebook and Pin it as well! Use hashtag #createtolive when tweeting or pinning so we can find and share your posts. Your project can be anything you create using this picture as your inspiration. Using Susan K Weckesser Inc products are not required, but are ALWAYS welcome and appreciated. :-)


The prize for this challenge will be drawn randomly by Inlinkz when the challenge ends on 10/31/2014 at noon EST. The winner will receive The Garden {What-Not} Collection Stamp Set co-branded with Unity Stamp Company. We can’t wait to see what you create!

https://www.etsy.com/listing/84732887/live-in-color-scrapbook-paper-collection?ref=shop_home_active_1http://unitystampco.com/shop/motherhood-is-a-verb/

Thanks for stopping by today!
~Dana Tatar - Susan K. Weckesser Designer

Monday, September 8, 2014

Paint the Town Red

Hi everyone, Steph Ackerman here today with a 5" x 7" canvas board project.

We had a flood in our home recently and many of my pretty papers got wet.  Rather than throw them all away, I decided to see what I could create with them.


I cut my damaged Canvas Corp. cardstock to 5" x 7", then crumpled it and spritzed it with more water.   


Once dry, I unraveled it and used Clearsnap's Mixed Media Inx in Schoolhouse to ink the creased paper.  Then I adhered it to an inked canvas panel with Mod Podge.


Placing The Crafter's Workshop stencil - Be on Time - in the corners, I inked portions with Clearsnap Licorice Ink using an art dauber.


A large flower was fussy from the Live in Color Collection and added to the canvas with foam adhesives for dimension.  Several Robin's Nest dew drops were added to the floral center. 


I cut apart the tag paper, inked it with red ink and added it to the canvas with foam adhesives for dimension.   A small Canvas Corp. clothes pin was the perfect final embellishment to hold the tag to the canvas board.


Steph Ackerman
DT Member for
Susan K. Weckesser

Friday, August 1, 2014

Anchored - with Canvas Corps and May Arts Ribbon

While I was getting my undergrad degree I also was obtaining my Third Mate's License.  This meant I was going to to sea every summer on a training cruise to gain sea-time for my license.  We did everything, navigation, maintenance, cleaning, lines, laundry, classes, watch, and much much more. I loved going to to sea, but my final cruise was harder to leave as I was leaving behind my fiancee at the time.  This picture is of us just before the ship left and I was on stern line duty.  It was very bittersweet I loved the sea, but to be gone for 3 months just broke my heart.


I used the beautiful July Kit from Birds of a Feather.  It is stuffed full of wonderful sea life papers, just perfect for my days out at sea.  Here I used tons of layers of papers, of a canvas triangle from Canvas Corps, flowers, chipboard pinwheels, twine, stickers, burlap from May Arts, stencils, punches, and a pull out tag.
  

I made the tag base from Susan K. Weckesser papers.  I cut out a white section of her "Live in Color" cardstock.  I then added in the dotted lines with her stencil in navy chalk ink (to use as my lines for the journaling) and then stamped in silver ink the super sweet triangle pennant banner from the "Create your Day" set.  I then added n strips of papers in navy and white colors and topped it off with a sticker and twine for the pull out section.

http://www.susankweckesser.com/susan_k_weckesser_incproducts


The tag reads "Departing on my senior cruise.  I was working the lines.  It was so bittersweet to leave.  I loved being at sea, but it was so hard to leave Mike." 


Here you can see additional use of Susan K. Weckesser's stencil with the chain and the "x" in navy ink on the papers.

I used Susan K. Weckesser stamps again here, with the triangle banner from the "Create your day" set as seen above on the tag and also a larger stripped triangle from her "Celebrate the Simple Things" set going across the page behind the picture from the left side coming back out on the top right of the layout.

http://www.susankweckesser.com/susan_k_weckesser_incproducts
The wonderful news about being gone from your loved one is the is light at the end the tunnel - the heaert does grow fonder being apart.  We were back together again three months later (he even met me at one port of call during the trip) and now have 4 beautiful children together.

Supplies Used
Canvas - Canvas Corps
Twine - Canvas Corps
Stain - Ranger
Pen - Marvy Uchida
Adhesive - 3M
Enjoy!!
http://scraps-of-reflections.blogspot.com/

Friday, March 7, 2014

How to Create an Illusion of Dimension and Texture

I love to create texture and depth in my layouts.  I don't always want them bulky, but I want the illusion of richness and intrigue.  Here I will explain a few tips on how to add texture and depth using clustering and layering on your projects without added in tons of bulk, plus you might think about your supplies you already have in a different light and sue them in a different way.  

This is a layout of my family, it is a simple day fishing at a lake.  I love the picture because it shows my boys in the back ground fishing with my husband and daughter watching them, of course fishing as well.  I used a filter on the picture through Instagram called Walden, it gave the picture a softer feel, more like nature.  I have found that having a great picture to start with when making a layout, versus a picture you kind of like but "need to scrap" makes a world of difference.  The picture gives me the inspiration I need and the page just comes more naturally instead of fighting with the need to "just get this page done".

 
I wanted to have the same feel in my layout, so the first step was to pull items that worked with the color scheme of the picture, the browns, greens, the feel of nature.  I picked out items that had texture to them already like the mesh flowers, the chipboard, the wooden items, cork, and the fibers.  Using items that already have their own texture gives your projects more depth and richness without even having to try.


Here is a list of a few things to the edges of the papers in your projects to add texture and dimension without adding bulk to the layout.

  1. Distress the edges of the paper with a distressing tool like your scissors and ink the edges.  I do this technique to tons of projects.  It adds a softness to the look and takes away all the white lines from the papers you just cut.
  2. Take an edge punch and randomly punched the edges, not really caring that the punches were aligned or even that the paper looks like like the punch.  I did this the tan paper all around the edge of the layout and also to the darker brown paper placed vertically behind the cluster.  Just a pop of each paper is visible, so it adds just a hint but that little touch add so much.  
  3. Add in grainy texture by applying a quick drying glue (like ZipDry) around the edges of the papers and layers and sprinkle on flower soft.  I used a light brown color.
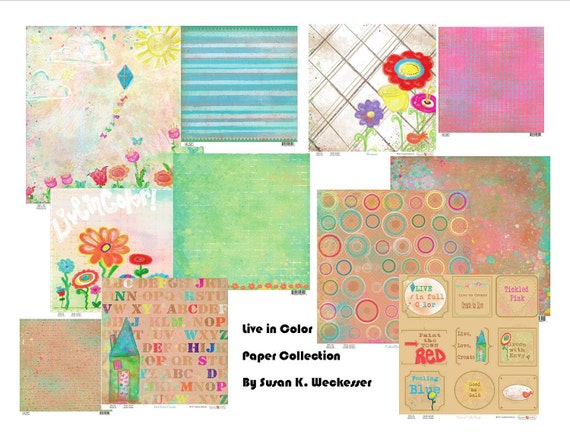
  4. Take some phrase stamps like those from Susan K. Weckesser saying "Create your Day" and "Don't go through life, grow through life" and stamp around the edges of the paper and at corners of strips in the foundation of the cluster.

http://www.susankweckesser.com/welcome


Here I used a wonderful stamp by Susan K. Weckesser that just captures the feelings the day "Celebrate the Simple Things"
http://www.susankweckesser.com/welcome


Here you can see some other texture applications I used in the cluster to add interest.
  1. Paint Splatters
  2. Stamps
  3. Layers of paper
  4. Inked edges of paper
  5. Distressed edges of paper
  6. Metal bits
  7. Crackle paint on chipboard
  8. Flower soft
  9. Rubons
  10. Items with texture already like the flowers and the jute.
  11. Mists
  12. Paint Splatters


Don't be afraid to try out an item in a new way or add things together to create something new.  Layers of papers mixed with other items add such a wonderful depth to your projects.  I have been told before and I fully believe there are no mistakes in scrapbooking just chances to expand your creativity!! 

Supplies Used
Cardstock - Core'dinations
Patterned Paper - Prima
Number Stickers - Glitz
Rubons - BoBunny
Jute - Canvas Corps
Flowers - Petaloo
Wood - Prima
Chipboard - Memory Maze
Metal - Prima
Cork - Fancy Pants
Stamps - Susan K. Weckesser
Ink - Ranger
Punches - EK
Stains and Mediums - Ranger

You can also view this article at Susan K. Weckesser.

Enjoy!!
http://scraps-of-reflections.blogspot.com/
Design Team for Susan K. Weckesser

Monday, March 3, 2014

Mixed media tag


Hello there, it's Jaine here again and this time with a tag for a little bit of inspiration. 

Our theme for this month is Mixed Media, a subject very close to my heart. I'm a mixed media type of gal deep down and like to show it when ever and where ever I can. So here I've created a tag and I've taken photo's along the way to show you the many layers.


I started off with a Ranger tag and covered it with some Canvas Corp. paper. This swirly red one is so cute.


Next, I decided I was going to add some more colour to the tag but I still wanted to keep some of the pattern in tact so I added embossing ink through a stencil with a sponge and embossed in clear powder to create my resist. The stencil is a home made one cut from a piece of acetate. 

It's a bit hard to see it properly but all will be revealed!


 I sprayed on Tattered Angels Chalk board ink in red, blotting off the ink from the embossed parts. I love the fact that I can still see the red pattern through the ink, it didn't hide it at all.


I expect you're wondering how I managed to stamp Susans little birdie from Sing your Song stamp set from Unity, looking the other way around? well, I stamped him onto a piece of tissue with a Versafine ink, cut it out then glued him back to front on a piece of copy paper. The tissue just disappears leaving the bird image behind.


I added a few spots of colour with marker pens.


I finished off with a few spots of Stickles and some felt at the top.


Bring on the Spring

Jaine for the Susan Weckesser Design Team.
x

ShareThis2

BrendaPInnickColorCafe