Showing posts with label Tim Holtz Distress Ink. Show all posts

Friday, March 25, 2016

Colorful Mixed Media Tag

Hello friends. Larissa here with you today. I have these big tags laying around and I have been trying to figure out what to do with them. Since I have been making things to decorate my planner I decided to do just that. I pulled out The Garden Whatnot Collection stamps.

I took five different Distress Ink colors: Mowed Lawn, Ripe Persimmon, Picked Raspberry, Mustard Seed and Tumbled Glass and sponged them all over the tag. I had no plan as to what color would go where I just filled in what I thought looked good at the time. :) 
Once I was done I heat set it just to make sure I didn't smudge it with my fingers as I was holding it down to stamp.
I used Black Onyx Versamark ink to stamp the images around the tag.

Once I was done I decided to place it in my planner with a planner clip I just made.


I just love the way the colors came out and the awesome stamps look on it. I decided to leave it alone after awhile. I thought first I need to add something to it but quickly decided against it.


I guess now everytime I flip open my April calendar I will think of Susan. :) 

Hope you enjoyed my post today.
Have a wonderful day friends.

Larissa Pittman 


Monday, September 15, 2014

Love and Dreams

Good morning everyone. How is everyone today? Today I decided to make a mixed media card. 
I usually only do journal pages for my mixed media so today I am working on something new. 
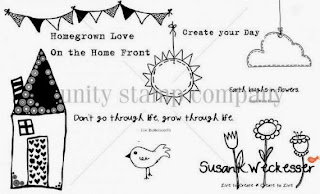
I started with one of my favorite stamp sets.
Create your Day!


I stamped the house and flowers with black ink.
I then colored them using Copic markers C5, C3, C1, C0 and R20.


I then used a pink Faber-Castell Pitt Big Brush Artist Pen to go around the edges.
Sort or a zetangle effect.
I then wrote the verse on the card.
"Home is a starting place for love and dreams."
It needed a little something else so I splattered some distress ink
all over the card. I used Black Soot and Pickled Raspberry with the
Distress Marker Spritzer. 


Hope you enjoyed my card today.
Don't forget to come back this week and see what the girls create.

Have a wonderful Monday everyone. 


Thursday, March 27, 2014

Flowerpot Mixed Media Layout

Hello friends!  Happy Thursday.  It's Lee-Anne here and today I am sharing a mixed media layout with Susan's stencils and papers. Since it is now Spring here in Canada, I can't help but think about gardening and all the flowers that are popping up such as tulips and daffodils.

My definition of mixed media is lots of layers using paints, inks, stencils, sprays, stamps, flowers, fibers, papers to create texture and dimension.  For my layout below, I used lots of different mediums such as paint, sprays, ink, modelling paste and glitter.


For this layout,  I created with Susan K. Weckesser's Live In Color Collection.  First I fussy cut some flowers and the title "Live In Full Color" as well as drew freehand and cut a flower pot.

 I then ran the flowerpot through my embossing machine with a weaved basket embossing folder to give it more texture and dimension then inked it with some distress ink.

Next I took some modelling paste and a brick stencil and added it the paper as shown. I felt that it  needed some color so I used a paint dabber in a beige color and dabbed the bricks.  When the brick background was completely dry,  I added some paint splats in red and yellow with my acrylic paint dabbers.

I adhered the stencilled paper to the kraft background and then added my flowers and flowerpot, which I gave more depth by adding some pop dots.  I thought the flowers needed something so I added some Liquid Glass and some yellow Stickles to the center of the red flower and when they were dry, I outlined with a fine black pen.  Finally I used Susan's stencil and added some "grass" with a green paint dabber and and around the top right and bottom left with a white paint dabber.

Here are some more closeups


I am going to put this in a 12X12 scrapbook frame and add it to my studio.  I hope I have inspired you to create.  Have a wonderful day!

Lee-Anne

Thursday, March 6, 2014

"Welcome Home" Memory File

Hello All!!

Keri Sallee here...ready to show you another fantastic project featuring Susan's Whimsical Paper!!

I have always loved the color combos of Susan's paper, but when I was looking for something in my stash to add with it I couldn't find anything that played well with the colors...until...I found my Heidi Swapp Color Pop Memory Files! 

The coral color mini folder was a PERFECT compliment to Susan's colorful paper.


Here's what I came up with!


I originally thought this would be a great little book for someone buying their first home, but then I thought BIGGER! It could be for a new baby or an adoption or a couple getting married. SO many options!!

I loved the idea of my little couple holding hands and since home is all about love, I added a little natural wooden heart from Studio Calico. My little people are from Hobby Lobby. 


I didn't want my people to be flat acrylic, so I gave them each a healthy layer of Decoart One Step Crackle. This gave my couple not only shine, but some fun interest. 


My title is made with letter stickers from 7Gypsies and  Wooden Letters from Pink Paislee. Again, I wanted my letters to have some texture and interest, but since I didn't want them to "match" my couple, I decided to mix my crackle paint with some acrylic to give my letters a little more of an aged look. This also helped to tone down my BRIGHT yellow letters.

Ready for the inside?


I wanted my inside to be versatile, so I added a place for a single photo on the left and a mini book on the right for a lot more photos and journaling. 


The book was made by simply adhering 4 mini files (from 7Gypsies) to a piece of Susan's Paper than I had folded into an accordion shape.  


To add some fun, I used some bright Tim Holtz Distress ink on the tabs and a cloud from Susan's Paper with some stamped images to form my cover. 


All of my stamped images were colored in by simply watering down my acrylic paint or coloring it in with my white gel pen. Doing this allows the stamped images to show through. (Just a note: Make sure to use a permanent ink, like Ranger's Archival Ink in Jet Black like I did or else your ink will smear when you paint it.) 

So there you go! I hope you liked today's project and it inspires you to make something fabulous!


Until next time friends...choose to make your art intentional...not an afterthought!

XOXO,
KERI


Wednesday, February 12, 2014

Let's get "Tickled Pink!"

Hello Creative Friends!

Keri Here...I'm so excited to share my Mixed Media Canvas called "Tickled Pink."


I wanted to do something little different with Susan's In Circle Me stamp for Unity Stamp Company

So I decided to try stamping it into an almost dry layer of modeling paste I had spread along the edge of my canvas. Here is a close-up of the "naked" boarder:


The key to making this technique work to do allow your modeling paste to dry (naturally or using a heat gun) until it is no longer sticky anymore, but still move able. Work in small areas and clean your stamp as soon as you are done (Modeling paste is a BUGGER to get off once it's dry!)

Here are a couple of close-ups:


Want some more details? Check out my blog: The Creative Life Studios for step-by-step instructions and more pictures. 

Until next time friends...choose to make your art intentional...not an after thought. 

xoxo,
KERI


Wednesday, January 15, 2014

The Road to a Friend's House..

The road to a friend's house is never long, and who wouldn't want to visit a friend at this cheerful little house from a Susan K. Weckesser stamp?
The house image is from the le mason stamp set and I just love the quirky, mismatched windows and whimsical flowers!  I stamped it onto a lightly patterned paper tag using Archival Ink then used a water color technique and Distress Inks to add the color.  
I used Glossy Accents on some selected areas of the image - the roof trim, windows, door, flowers, and fence posts - just to add a little shine and dimension.

If a little dimension is nice, then a lot of dimension must be even better, right?  I love playing with Shrinky Dinks!  I stamped the sun from the Fly Away set onto the rough side of the shrink plastic then colored it with a combination of Distress Inks and colored pencils. 
The two little "friends" on the pin were also created with Shrinky Dinks.  The one on the left was stamped on the "rough" side of the shrink plastic, the one of the right was stamped on the "smooth" side (and then left to dry before I handled it very carefully!) - that is how I got the two little friends to face each other!  I colored on the "rough" side of  both with colored pencils before I  put them in the oven.  I did use a slightly different color scheme, but the image on the right is a lot clearer.

The last little detail I added was a cute little plume of smoke from the chimney.  I created it by trimming a couple of pieces from Want2Scrap Black Rhinestone Swirl bling.
Thanks for stopping by and I hope you find some time to play today!


Susie Bentz
Susan K. Weckesser Design Team Member

Susan K. Weckesser Products Used:

Other products:
  • Swirls - Black Rhinestone by Want2Scrap
  • Road to Friend Amuse Art Stamps
  • Glossy Accents, Archival Ink,  Distress Inks by Ranger
  • White acrylic paint
  • Jovial, Basic Grey
  • Shrinky Dinks
  • Tag, pin, beads.

Monday, January 13, 2014

Create Your Happy Day!

Oh..My...Goodness...it is so COLD here!

This southern girl does not like temperatures in the teens and gloomy overcast days.

So let's BRIGHTEN up our day and create some happy shall we!?


When I first joined Susan's design team, the only "request" I had was "PLEASE...can I have the 'Little Bit of Washi' stamp set?" It is just absolutely perfect for...well...everything!


Since I've been in Glooms-ville, I wanted to make myself a little something to brighten my day and finally use ALL of my bright Tim Holtz Distress Inks in one place. (I have not idea why my yellow isn't Tim's!)


To make this card, I just had fun and randomly layered the washi stamps on top of each other using bright inks. My "Happy Day" title is a clear sticker that I bought at Michael's dollar section years ago and I just added the "Create Your" using the "Create Your Day" title from Susan's stamp set by the same name. 


I hope this brightens your day and inspires you to "Create Your Happy Day!!"

Until Next time...XOXO...KERI

Tuesday, January 7, 2014

Build Your Dreams

Hello everybody!

Emmy here with a new project to share! I created this layout using a lot of different products from Susan K. Weckesser Inc.Susan K. Weckesser Inc. and Unity Stamps, Ranger Inc., Tim Holtz, May Arts and Tattered Angels.


For my background I used Tim Holtz "Cargo" layered stencil and different colors distressed ink pads. I stamped the alphabet washi tape with the Susan K. Weckesser and Unity Stamps "abc.123.washi" stamp set and Ranger Ink Archival ink pad - brown.


I thought the pattern of the stencil compliments very nicely the pattern on Susan K. Weckesser Whimsical Paper "Live Love Create".


I decorated the little buttons with a double color string from May Arts.

For my title I used Tim Holtz Nature Grungeboard. I altered the letters with blue and green embossing powders from Sparkle N Sprinkle.


I used Susan K. Weckesser Whimsical Paper "Beautiful Daydreams" to fussy cut the clouds and the stars. The house I cut out from the "Live Love Create" paper.

I created the small banners on my layout by cutting out the information strip from the pattern paper - yes, even there you can find Susan's signature style and use it to embellish your project.


The cute colorful circles I fussy cut from Susan K. Weckesser Whimsical Paper "Color Burst". I added Making Memories Grommets in the middle of some the circles to complete my design.


I hope you enjoyed today's post!

Come back tomorrow for more amazing projects from our design team!

hugs,
Emmy

Saturday, December 21, 2013

At the Beach

Hello crafty friends!

Emmy here with a new post, using the amazing stamps and papers from Susan K. Weckesser Inc.

I know it is winter and cold, and Christmas is just a few days away, but I just printed over a 1000 beach sunny pictures from our summer holiday and I couldn't resist these cute photo's.


We were at the beach in Greece and the sand was so warm, that little Theo decided that crawling is a much better options than walking. 

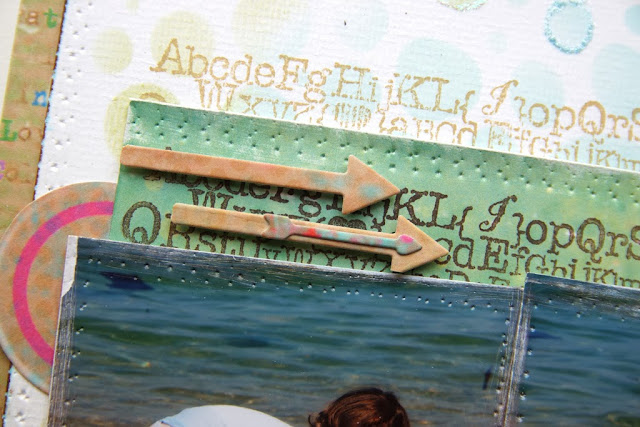
For my background I used Susan K. Weckesser Whimsical Paper "Live Love Create" and white cardstock. I altered the cardstock using a masking template and Tim Holtz distress ink pads. After I was satisfies with the result, I outlined some of the circles with Ranger Ink Stickles Glitter Glue.  


When the Glitter Glue has dried,  I finished my design using Susan K. Weckesser and Unity Stamps "abc.123.washi" stamp set


I layered my pictures on a stripe of Susan K. Weckesser Whimsical Paper "Live in Color". I stamped the alphabet washi image and distressed it edges. For the arrows I used a Sizzix die.


The cute colorful circles i fussy cut from Susan K. Weckesser Whimsical Paper "Color Burst". I added die cut cameras and brown pearls.


I hope you enjoyed today's post!

Come back tomorrow for more amazing projects from our design team!

hugs,
Emmy

ShareThis2

BrendaPInnickColorCafe