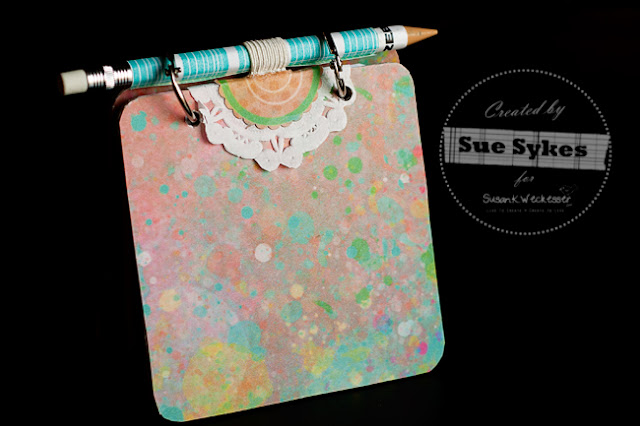
Today, I want to share a mini sketch book that I created to keep on hand for when inspiration strikes. Because according to Murphy's Law, when it hits me, I'm usually empty-handed, with nary a pad nor pen handy! :)
I created the album using
From the patterned paper, I fussycut the "Green with Envy" tag and removed the inner part, leaving a Polaroid-type frame. I then mounted it on a scrap piece of the reverse coordinating side of the Live In Colour Tags paper, after flicking it with my watercolours. The title was added and the whole thing was mounted onto the album cover. I wrapped it all with a satin ribbon and then embellished with flowers and butterflies (of course!), cut and punched from coordinating patterned papers.
The pencil holder was made by folding a short piece of elastic band around the pencil and sewing a loop. I then punched a circle from patterned paper and attached it to the mini doily. Using the loop as a guide, I cut a slit through both, using my craft knife. I fed the elastic loop through the doily/circle and then attached it all to the upper portion of my chipboard, centering it between the punched holes.
The pencil was made by stamping plain copy paper with turquoise ink and the A Little Bit Washi stamp set. It was cut to length and then wrapped around a mechanical pencil that was covered in double-sided tape. Easy peasy!
For the inside pages, I wanted pre-drawn squares to use when I am brainstorming sketches for the Sketchy Challenges for Canadian Scrapbooker magazine. Using Adobe Illustrator, I created the custom pages and printed them out. Once they were all trimmed down to size, I marked and punched the holes with the Cropodile and bound it all together with 1" binder rings.
Thanks for looking - hope you enjoyed my project!
Cheers,
Sue :)
My Blog: Kewl Beans


This is an adorable mini. Love it!
ReplyDeleteTHis is a super cute project, Sue!
ReplyDeleteSue how cute it is!Ready to contain your inspiration!
ReplyDeleteStunning Sue... every single detail!!
ReplyDeletexoxox