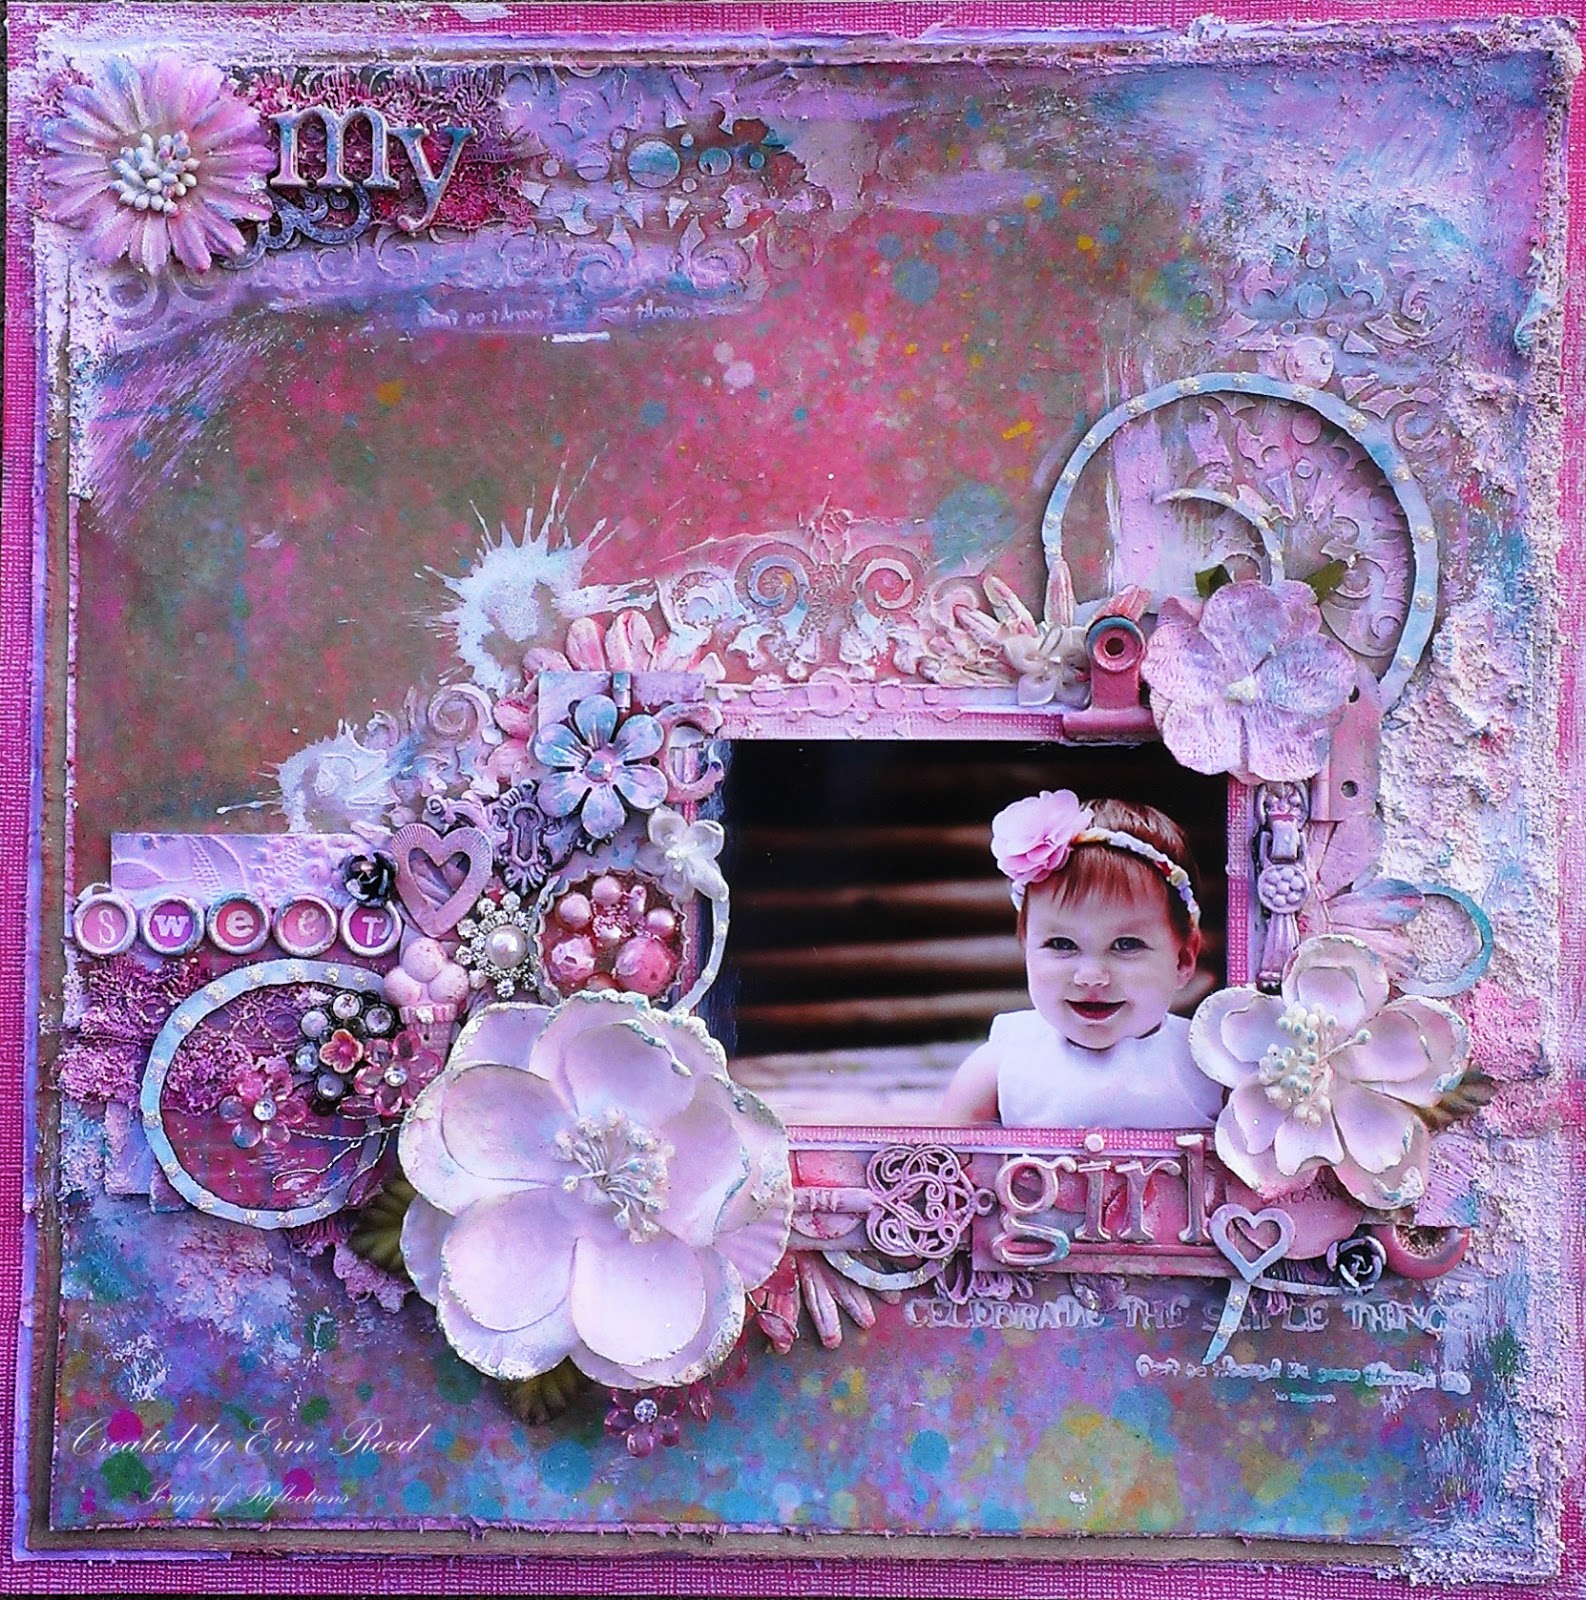
For Catherine's first birthday we had a
few pictures taken by a friend, and they turned out wonderfully. This
is one of the beauties that came out of that shoot.
I
love the look of mixed media, playing with your embellishments,
creating texture, looking around the page at all the fun different
items, but never taking away from the picture itself. That is part of
the art, not letting the page "eat" the picture, but letting the page
enhance the picture.
Below is my methodology of how I build a page - a peak into my head so to speak. Sorry for the lighting on some of the pictures, I did not always have the best light available as I was building my page.
How to Build a Mixed Media Page
1)
I start with the papers. I look for papers that correspond to my
picture, I want to complement it, not fight with it. I used my
daughter's hair bow (since the rest of the picture is brown, flesh, or
white I used those colors (pink, teal, white, etc). The papers from Susan K. Weckesser were a perfect match, they just begged to go with this picture.
The "color burst" paper was perfect for the background, and then I added in the "bouquet" and "beautiful days" as layers.
2) I this point I have a sketch in my head of the design of the layout, I know I wanted the picture in the middle right, with elements going above and to the left of the picture. I
start pulling items that I think will work on my page, not caring about
color, just the shapes. Not all the items will make the cut and be
used, but this gives my an idea if I like where I am headed. Nothing is
glued down, it is just my rough idea at this point.
3)
I apply gesso to all the embellishments that need a change of color
(except for the top lace it was white so it took color no problem). The
spray them with spray mist. I used Tattered Angels mist in a couple of different shades of light pink. I mist them each 2-3 times to give them a good coat.
I also let them dry before each coat so they absorb the mist better. I
do this off the page so I do not apply to much mist to the background
papers.
4)
Now I add texture to the page. I used stencils by Prima with gesso,
added in my papers (distressing each layer of paper with scissors and
edging them with ink) and trims, and for fun I added in layers of
Snowtex. I gives this wonderful bumpy texture. I even took a couple of
Susan K. Weckesser
stamps and stamped in gesso below the picture and in the top left
corner below the lace and stencil area. I used two small phrases found
on the stamps sets below "Celebrate the simple things" and "Don't go through life, grow through life"
5) Now I start to add my embellishments back on. I do not have the picture glued down yet, as I might still spray and I don't want to damage my picture.
6)
I start to glue down items as I like to way the looks in that
location. I sometimes take pictures and step away for the page to see
how it looks a hour later (especially if I am waiting for something to
dry).
7)
If I feel there are dead or blank areas, I will either add in another
embellishment (or two) or add in more texture. I did this just above
the picture, it felt it was missing something so I added another bit of
stenciled gesso. I also sometimes move things around or change the item
completely. I just let the page go with the flow. I don't fight to
make it work, because I find it never looks good if I do that.
8)
One of the last steps is to go over the gessoed embellishments one more
time with paint or chalk ink, sometimes both. This help them pop out
of the page a bit. I might even add a bit more gesso to the items so
they don't look to pink. it adds contrast. I also leave some items
plain, or without gesso like bling and such. On this page I also added
on some glitter via Stickles from Ranger in Crystal for a bit of sparkle.
9) You can see some of the texture and the Susan K. Weckesser Stamp
Supplies Used:
Cardstock - Core'dinations
Patterned Paper - Susan K. Weckesser
Flowers - Prima and Petaloo
Media - DecoArt, O'Leary paint, Liquitex,
Paint, Mist, Sprays, glitter - Ranger, Tattered Angels, Martha Stewart
Metals - Prima, Momenta, and Other
Chipboard - Memory Maze
Stamps - Susan K. Weckesser
Mask - Prima
Trims and Lace - Other
Found Objects - Other
Enjoy!!
Erin Reed Design Team Member


No comments:
Post a Comment
I would LOVE to hear from you! Please feel free to leave a message!
~Susan