Tuesday, December 31, 2013

Happy New Year!


Hello everyone!
MIYAKE here again! :)


2013..Did you happy?

It was a year full of joy for me.
Especially, It's nice to be here together.

I will never forget.

Koreans thought magpie singing welcome visitors coming to call.
This story dates back to ancient times.
The magpie is considered a bird of good luck in Korea.


Tim Holtz Alphabet + Distress Paint
I love this combination.


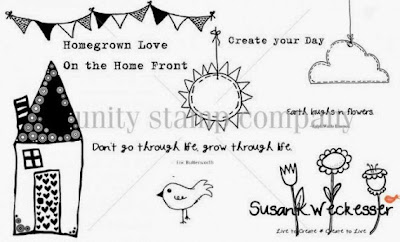
When I saw Susan stamp I think I found an old story.


Does it look like a magpie? :)


I used Dylusions Ink Spray from Ranger Ink.
The features of this ink is gorgeous and vivid color.


Happy New Year!


Joyful


Monday, December 30, 2013

Create, Inspire and LOVE... 2014!

Hello Everyone...Lynne here today (smile) and in just one more day it will be the beginning of another new year and this REALLY excites me. "Why?" you ask, since we do get a new year Every year... Well, the answer is the older I get the more I appreciate the gift of Time... and to me every single new year is a gift of more time to do things I haven't tried yet and to continue doing all the things I already love to do - which is what I did today!  I am so very excited to be able to share with you a brand new canvas I created using three of Susan K. Weckesser's Unity stamp sets, some heavy-body acrylic paint and incorporating some of my newest art passion - my Zentangle patterns.

Susan's house stamp from her Little Haven set is so easy to fill with "tangles" that I just couldn't stop... the hardest part of the entire process was trying to decide whether or not to color in my pattern-filled house or to keep it black and white.  As you can see they both have their charms...


In the end I decided to use color... because that's just how I roll! (smile)


To create this wonderful zentangled house I stamped my image on 140lbs watercolor paper with Archival ink and used my Sakura micron pens to create the patterns inside the house.  I used watered down colored india inks to wash in some color and because all the products I used were waterproof there was no transfer of color or ugly black smears when I added the color or when I glued everything onto my canvas.
 

I added patterns to all the elements I stamped and after I had all my elements in place and nicely glued down I "painted" the canvas with my tiny bottles of stickles, liquid pearls and liquid glass to add light and lightness to the finished canvas.

This lovely piece of happiness with its uplifting message is going to hang on my studio wall for all of 2014 to remind me of that wonderful saying by Picasso:
"Inspiration exists, but it has to find us Working"

Thanks for stopping by to share with us today... and don't forget to leave a comment if you liked what you see!
Cheers!
Design Team Member 

Products used on this project:
Susan K. Weckesser/Unity Stamps - Little Haven 
Susan K. Weckesser/Unity Stamps - Painted Sentiments
Susan K. Weckesser/Unity Stamps - Fly Away

Golden heavy body acrylic paints
Golden matte multi-medium
Ranger stickles & liquid pearls
Sakura Pigma Micron pens
Maria & Rick's Zentangle Kit


Saturday, December 28, 2013

Christmas Themed Family Layout

Hello!  I hope you are enjoying your day.  It's Lee-Anne here and today I have a Christmas themed layout to share with you using Susan's awesome stencil, a snowman stamp for the vellum snowman embellishment,  that I can't seem to get enough of, and some patterned papers from Canvas Corp. I also sprayed some Tattered Angels Chalkboard Mist in Ferrari Red,  as well as some twine on the banner from May Arts.   The sketch was designed by Karan Gerber.


I hope you are inspired to get inky and messy and use lots of different techniques on your next layout.  Thanks for stopping by and have a lovely day!

Lee-Anne

Friday, December 27, 2013

Let it Snow double frame

Hello crafty friends, Einat Kessler here with a project to warm your hands ! Now that winter is here and some places are already snowy and white you probably have fun photos of playing in the snow, building snowman or making snow angels. Here is a great idea to display these photos in a double chipboard frame!

Start with stamping a piece of thick transparency with a snowman from the Let it Snow set. Use a permanent ink like StazOn to make sure it will not smear. Emboss the snowman with white embossing powder. I used an embossing markers to make sure I only emboss the inside of the snowman and not cover the black outline. Cut around the snowman shape.


Stamp two clouds as well. I embossed one cloud with teal, grey and sparkle embossing powders and covered the other one with white paper.


Then cover the bottom of the chipboard frame with cheese cloth to create your snow.


Add a little light blue color with color spray or Pan Pastels.


Adhere the snowman and clouds on the frame and add rhinestones.


to finish the frame stamp Let it Snow on the frame. Stamp the sentiment from the same set on a white piece of cardstock and cut it in a cloud shape. Adhere it to the frame.

Now all you need to do is go outside, have fun and take a picture of it!

Have fun creating!
Einat

Thursday, December 26, 2013

Birthday card with Poised & Pretty

Hello everyone!

Emilia here with a new post featuring the amazing Poised & Pretty stamp set from Susan K. Weckesser and Unity Stamp Co.

This time I decided to create an all occasion girly card:


I used a 13 x 26 cm cardstock from Core'dinations.


The beauty of this card technique is that you can create your own layout by folding and cutting the different parts in the exact way that will fit your design best. I decided to go with a square card, because of the length of the stamp I wanted to use - the Poised & Pretty stamp set from Susan K. Weckesser and Unity Stamp Co. 


I used one of the dresses from the stamp set and the hat. for my bow I used ribbon from May Arts Ribbon.


To finish off my design I added Ranger Ink Liquid Pears and brown pearls. 


I hope you enjoyed today's post! 

Come back tomorrow for more amazing projects from our design team!

hugs 'n smiles,
Emmy


Tuesday, December 24, 2013

Santa's Message Board

Twas the night before Christmas, when all through the house
Not a creature was stirring, not even a mouse.
The stockings were hung by the chimney with care,
In hopes that St Nicholas soon would be there.


Preparations had begun with the stocking on the mantle and milk and cookies place right beside....then the kiddies exclaimed that they wanted to leave Santa a message when he came to our house!  So I whipped up a message board so we could shout out!  (Ok if you have not realized yet I suck at poetry)

First I found a white picture frame that was lying about.  I removed the back and cut a piece of Fancy Pants paper to fit the inside.  I closed the frame back up with the paper inside.


I then cut out from another piece of paper the three Christmas trees that were on it.  This was glued to the frame and glass.  I added two Want 2 Scrap flourishes onto the frame and glass as well.


I then stamp Susan's snowman onto glossy paper, cut him out, coloured him in and pop dotted him onto the trees.

I then took various Fancy Pants stickers and added them to the cluster and top of the frame.

I also added a flower, leaves, buttons and bling to jazz it up!


Now you can write in the glass with a water marker or dry erase any messages you would like to leave for Santa or other people in your family.


At the end of the season wipe clean so it is all ready for next years message.  A cute idea not only for Christmas but you can make an everyday one that you can leave messages on, shopping lists etc.

Hope you enjoy!  Merry Christmas and happy holidays!

Jennifer

Monday, December 23, 2013

Merry Christmas Card

Every year I love to hand make Christmas cards, some I make quick and easy and some I spend more time on, it really depends on who I am giving them to knowing if they will keep them or not.  My mother and mother in Law always keep the cards, tags, and such that I make so I love giving them my special ones.


Here to went with a monotone color scheme, green.  I then added in colors of beige, gold, and grey to match with the papers I was using.  I wanted to give lots of texture, so I added in the wonder burlap tag by Canvas Corps in my layers, plus some corrugated paper from Fancy Pants in grey.  I then added in lots of layers of patterned paper for even more depth and dimension.


I wanted to add something more behind that back drop of the "Merry" word, but more have it ass bulk - enter in stamps!!  I stamped the wonderful flag banner stamp from the "Create you Day" collection from Susan K. Weckesser stamped in gold by Ranger.  It added that perfect pop and texture needed!!

http://www.susankweckesser.com/susan_k_weckesser_incproducts 

 To round it all off I added some leaves, flowers, and a die cut ornament to finish the card.  It does add bulk and dimension, but standing up on a mantle or a table with other Christmas cards this sure does stand out!


 Merry Christmas!!

Supplies Used and can be purchased from Flamingo Scraps
Patterned Paper - Basic Grey
Die Cuts - Basic Grey
Flowers and Leaves - Prima and Maya Road
Acrylic word - Heidi Swapp


Design Team Member for Susan K. Weckesser

ShareThis2

BrendaPInnickColorCafe