Thursday, May 30, 2013

A is for Art!

Or in this case, it stands for Aili, my daughter.  (It rhymes with smiley, in case you are wondering!)

Hello, everyone!  It's Sue Sykes here today, a little bittersweet that this is my last day to share a project as a Guest Designer with the Susan K. Weckesser team.  Susan and the ladies have been wonderful and welcoming, and I'd like to send them all a little note of thanks!

Today, I'm going to share an altered project with you.  I have a box of "alterable" items that I keep for when inspiration strikes.  I found this thin wooden alpha in there - I had purchased it a while ago at Michael's during a US shopping trip.  I knew I wanted to alter it for Aili's shelf in her room but wasn't quite sure what to do.  Susan's whimsical papers were perfect!

Supplies used:  Wooden letter; Susan K. Weckesser Whymsical Paper; Plaid ModPodge; Sizzix Tim Holtz Alterations die (Tattered Florals); Spellbinders die (Foliage); My Favourite Things Dienamics dies (Loopy Bloom, Large Rolled Rose, Rolled RoseMini Rolled Roses); Recollections paper tape, wire, rhinestones; water mister; hot glue gun.

I covered the letter with patterned paper and ModPodge.  While waiting for it to dry, I cut all of my flower pieces and foliage from various papers and created my flowers.  Once the flowers were completed, I adhered them, one at a time, beginning with the largest flowers.  After all the flowers were in place, I tucked in my foliage as needed, and added rhinestones as accents to a few flowers.


The corkscrew tendrils were created by covering thin wire with green paper tape and curling around the handle of my paper piercer.  So easy and adds great texture!


Here's a view from the right and left sides.


Thanks again to Susan and her team for their kindness and inspiration over the last few months!

Cheers,


My blog:  Kewl Beans

Monday, May 27, 2013

Banner Gift Card and Tag Set

Susan sent me some stamps recently, one of them being Celebration of Simple set.  I LOVE these over sized banner stamps!  I started by stamping each of the images onto scrap Susan K Weckessar paper.  I stamped quite a few as I knew that I wanted to make a back ground with them.  I cut each one out around the outer line and ended up with this.


I then made a card base using some kraft paper. 


I them took the stamped images and layered them onto the card base and moved them around a bit till I was satisfied and then glued them down.


I then flipped it over and cut off the edges to square it up using the original size of the card.  At this point I decided to make a tag as well which can go on the outside of the bag and the card to go on the inside of the bag.  Tag was made from left over piece of kraft paper, corners trimmed to make and

angle on the top corners.


The I took a few stamps I have never used before, but love the images of them, and stamped them on the kraft paper as well, I cut them out and pop dotted them.  The images are of circus animals and thought that went well with this stamp set.  Here they are aren't they cute? 


Here is the finished product!  A fun card and tag for a birthday, celebration or any even that you want to celebrate!  Just add to the gift.  I added a bit of bling to the center of the black dots as well as some sparkly ribbon.


Thanks for stopping by this glorious Monday...have fun and take care till next time. 
 
 
Jennifer


Friday, May 24, 2013

Look Who is Joining the TEAM!

20090109_309Join us in Welcoming Sherry Mendoza to the Susan K. Weckesser Inc. Team!

Sherry will be taking up the role of Business Coordinator. How cool is that!!! Sherry  is a happily married Mum of four who has been working in the paper crafting industry for over 8 years. Sherry is experienced in many areas, including project and product design, marketing, social media, editorial and education. She loves to dabble in all different styles from simple and stylish to messy mixed media, it really depends on her mood and what she is inspired by when she is creating.  We are so glad to have her joining our team.

I know that you have met Lynne Mizera.

Isn’t she AWESOME!!! She is now part of the Susan K. Weckesser Inc. DT. See what happens if you are a guest…we might want to keep you forever!!

We have some super COOL things planned in the near future and we are going to need your HELP! SO….stay tuned!!  I am so excited…. because it means….

COLOR + FUN = HAPPINESS

Sneek Peak 1

Did you like my super {SMALL} sneak peek!?! Yup…I have been busy!

Hey, Remember, if you would like to be our guest……..Guest Designer Call

Have a WONDERFUL Day!!!! Remember to find something that makes you smile today!!!

hugs,

Susan

Wednesday, May 22, 2013

Making Your Own Patterned Paper...

Hello Friends! Lynne Mizera here to share with you how I made my own beautiful patterned paper using Susan's Autumn Grunge stamp set from Unity Stamps.

To create this page I used watercolor paints but you can use inks or sprays or gelatos for this three-step, embossed-resist technique.

 
The process involves laying down some color on a blank page and stamping and heat embossing twice more to create all these lovely colors and layers.  Follow along as I show you how I created the patterned page below


I used a sheet of 90lbs Multi-Media paper with a vellum finish.  The vellum finish is important because it will allow you to wet the paper over and over again without it breaking down


I start by painting the entire page with my lightest color and I make sure it is completely dry before I add my first layer of heat embossed stamps using a watermark ink and a clear embossing powder.

Here you can see the paint detail before the excess has been buffed off
After I am happy with my first layer of stamps I add a second layer of paint colors up to my medium darkest value, saving my darkest colors for the final layer.  I paint right over top of the embossed images.

Add caption
When the second layer of paint has dried slightly I use a wet wipe to gently remove the paint from the first set of embossed images and to blend and lighten the colors on my page if they are too dark; Make sure your page is thoroughly dry before you add a second layer of embossed stamps incorporating the new colors. I keep adding color, removing it slightly and stamping and embossing until I like the effect and I have enough images on my page.

On this page you can see where I used a wet wipe
Finally I apply my final layer of paint in the darkest values, allowing it dry slightly and then buffing off any excess paint from all the stamps so they really pop off the page.   

The darker the background color the more your stamps will emerge from the background. (see the detail below)

I love using Susan's Autumn Grunge stamps for this technique... this detail photo shows you the rich color and multi-layering on this page... the possibilities are endless.

Thank you so much for stopping by and sharing my very first post ... now go and make some of your own original patterned paper!
"Scrapbook Lynne" Mizera


Monday, May 20, 2013

Textures and stamping!

Hey there bloggers Rita Barakat  here with a different 
technique you can use with your Susan K. Weckesser/Unity stamps!
I used the Sing your song stamp, here is a close up ...


Spread Modeling paste.
Stamp the wet modeling paste,
clean your stamp with water right away!
I keep a spray mister and paper towels handy.
Allow to dry completely!
 Don't you just love that cute little bird? Here is the finished layout!

Thursday, May 16, 2013

Come Sail Away - Art journal page

Hello friends! JJ here today, to share an art journal page with you.


For this page, I combined Susan's whimsical stamps with Pan Pastels for a soft looking page.   I started with the boat from the Sail Away stamp set.  (Colouring inside the lines is not always required)  :)    The word "Hope" is from the Painted Sentiments stamp set, and was my cue for how the rest of the text would flow.


I keep coming back to these little clouds from the Create Your Day stamp set.  They just make me happy.  Once all the colour was added with Pan Pastel, I sealed it with a fixative, and used Faber-Castell PITT pens for the lettering.


Supplies used:
Create Your Day stamp set
Sail Away stamp set
Painted Sentiments stamp set

Thanks so much for visiting!

JJ Sobey, Design Team member for Susan K Weckesser.

Wednesday, May 15, 2013

Journaling with Tim Holtz Distress Markers

Weckesser Home Journal Page

I know that you know, how much I LOVE doodling, journaling, and COLOR! It is therapy for me really. If I am tired, stressed, grumpy, sad, happy, excited, scared…almost feeling anything really,  I will doodle. Well, except hungry! Hard to doodle when I have food in my hands!

photo (7)

And a  girl has gotta eat! But why do I make yummy things for the kiddos all the time…. *sigh* I just don’t know! *grin*Weckesser Home Journal Page 3

So, when I got my hands on some of Tim Holtz Distress Markers….well, {MAGIC} happened!!! I took  out one of my really old journals and some of my co-branded Susan K. Weckesser Inc. /Unity Stamp Co. stamps. The colors of the markers are SO bright and wonderful to work with! You can easily blend with them, which I did by using my refillable watercolor brush and ink blending tool from Ranger. You can draw directly onto your project and then blend with your blending tool or watercolor brush or your can scribble a bit of ink onto a Ranger non-stick craft sheet and then pick up the color with your watercolor brush. Tim Holtz Distress Markers are are water-based inks, which making the blending and the layering even more magical and fun!

Heartfelt Warmth 1

Le Mason 1

Weckesser Home Journal Page 2

I also created a fun grungy background by lightly using the side of nib of the marker and directly applying ink to my background stamp, “In Circle Me”. What is really cool is the Tim Holtz Distress Marker in the color picket fence. When you apply it, at first it looks like you haven’t done anything. However, in a couple of seconds a lovely bright white appears! So much fun!

In Circle Me 1

Weckesser Home Journal Page 4

Thank-you to everyone that left a comment for the Mother’s Day giveaway! The winner is…

Jessica Buffa

Congratulations Jessica! Can you please email me at susiebeestudios@gmail.com .

Have a super colorful day everyone! Enjoy all the color around you today! I know that I am sure enjoy the blossoms and colors of spring…

hugs,

Susan

Monday, May 13, 2013

Home of inspiration

Hi Susan Weckesser's fans, Einat Kessler here with a fun inspirational project!
One of my favorite Susan weckesser's stamps is this cute adorable house (LOVE stamp). So I decided to use this stamp and create a project that can be an inspiration for you all.


I started with stamping the house on different Susan Weckesser's patterned papers and cutting the parts of the house like the window, door or roof. Then I played around with the parts so each house got a different color of window, roof or door.
I embellished the houses to fit the sentence I wanted to add.
"The house does not rest on the ground it rests on a mother": I stamped the Motherhood is a verb stamp and cutout the image. I added lace, some cut flowers and the sentence.
" Fill a home with love and it will fill your life with color": I added some colorful buttons on the house's roof and added the sentence.


"Home is where the heart is": I cut hearts in different sizes and shapes and adhered them on the roof. I added the sentence replacing the word heart with a shaped heart.
"Home is an inspiration for memories": I embellished the house with parts of clocks which to me represent time and memories. I added the sentence and wrote the word memories in a circle shape to compliment the clocks' shapes.


These four cute houses can be a mini album, a banner or even be placed on a frame. You can keep on creating houses and add more inspiration!

Have fun creating!
Einat

Friday, May 10, 2013

Step by step- Mixed media layout

Hey there bloggers Rita Barakat here with a mixed media layout!
It's a scrap-lift from  Misty Russell -
it was gorgeous so I had to copy lift it!
I don't know how she went about hers but here's how I made mine.

 
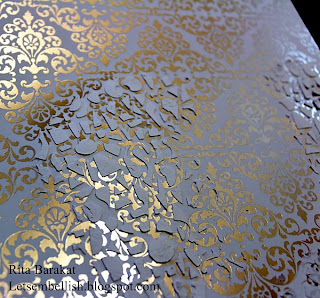
     First I started with a foil embossed paper ( DCWV )
Added some texture with modeling paste
and a stencil (Artistcellar Jill K. Berry-Romans)

After it was dry I added some color with Dylusions Ink spray.

Then I cut up some flags and sprayed some of those.
Added them onto my page, mxing in pattern paper (Susan K Weckeser) cut flags,
overlapping each other with some heavy gel medium.
Sprayed a ton of flowers to match.
And added a little text- Oh yeah- the pic on the left
was from our honeymoon way back when and the pic
on the right is last year. Which reminds me - we need to take a  new photo! 
And I need to scrap-lift more often, that was fun!
 

ShareThis2

BrendaPInnickColorCafe