Showing posts with label Tattered Angels. Show all posts

Friday, November 7, 2014

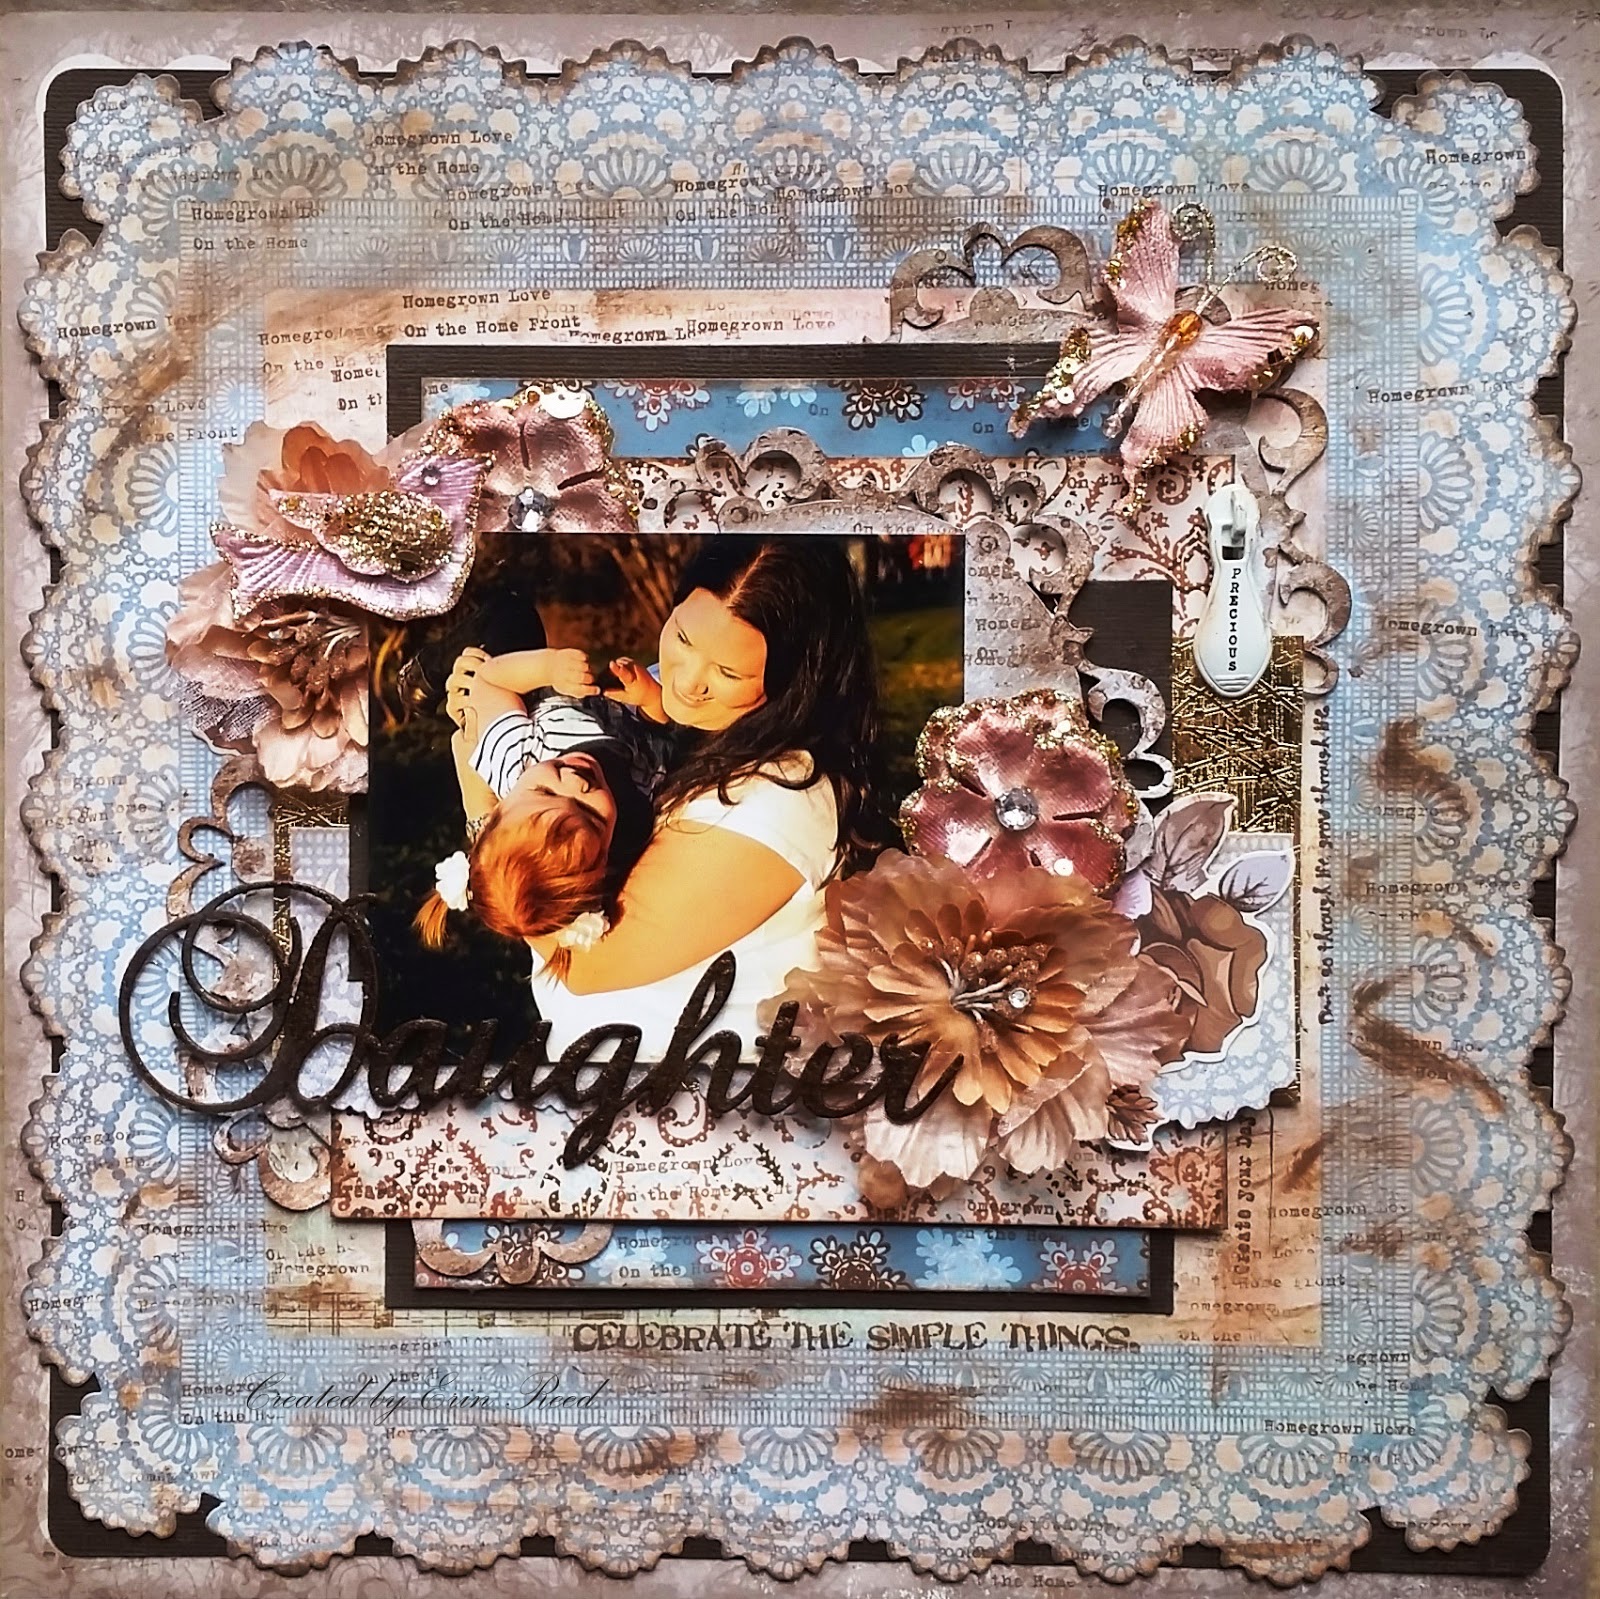
Daughter with Tattered Angels

This is a picture of my sweet daughter Catherine and I playing around last spring.  She just loves to be tickled and to be held upside down, and the wonderful photographer caught me playing around with her to get her in a good mood for the pictures we were about to have. Sometimes it is the pictures you were not intending on taking are the best!!


I used lots of layers per my norm, I just love layers!! It adds such a depth to any project, keep it from being so flat even thought it still is mostly flat, as it is just paper and ink.  I used the center of my papers as the focus of the layout, and just let the beauty of the doily edge around the outside shine. 

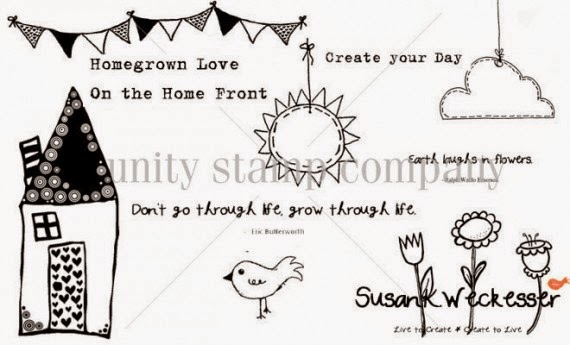
I love Susan K. Weckesser stamps, they work for so many projects.  Here are some of my favorite phrases.  One is "Celebrate the Simple Things" and boy is this true, never forget the little things that make life so full of joy!!  I used it here as a subtitle below some of the layers.  Here I also took the wonderful Glimmer Glam from Tattered Angels to paint the chipboard title "Daughter".

Espresso Bean- Glimmer Glam 1.35oz

http://susankweckesser.com/welcome


Here I took two of the phrases from the stamp set below "Create your Day" and "Don't go through life grow though life"  as they both just work with this picture so wonderfully.  I stamped these along the side of the layers as seen in the picture above.

http://susankweckesser.com/welcome

From the same above stamp set I also took the phrase stamp "Homegrown Love On the Home Front" as used it randomly around the page for lots of subtitles and also to add an even more distressed look to the page.


Supplies Used
Cardstock - Bazzill - ScrapPlezier
Patterned Paper - Kaisercraft - ScrapPlezier
Gold Paper - Creamotion - ScrapPlezier
Stickers - Kaisercraft - ScrapPlezier
Stamps - Susan K. Weckesser
Flowers/Butterfly/Bird - Prima
Ink - Prima
Paint - Tattered Angels
Chipboard - Want2Scrap
Metal - Prima
Adhesive - Xyron
Enjoy!!
http://scraps-of-reflections.blogspot.com/

Wednesday, August 20, 2014

Lady in Summer - Tag with Core'dinations/Clearsnap/Tattered Angels

Tags are a fun way to try something new, step out of your comfort zone, and just play.  Why not play a little with the last bit of summer left!!  Can you not just imagine being the lady walking through these bright gardens on a beautiful summer day?!?


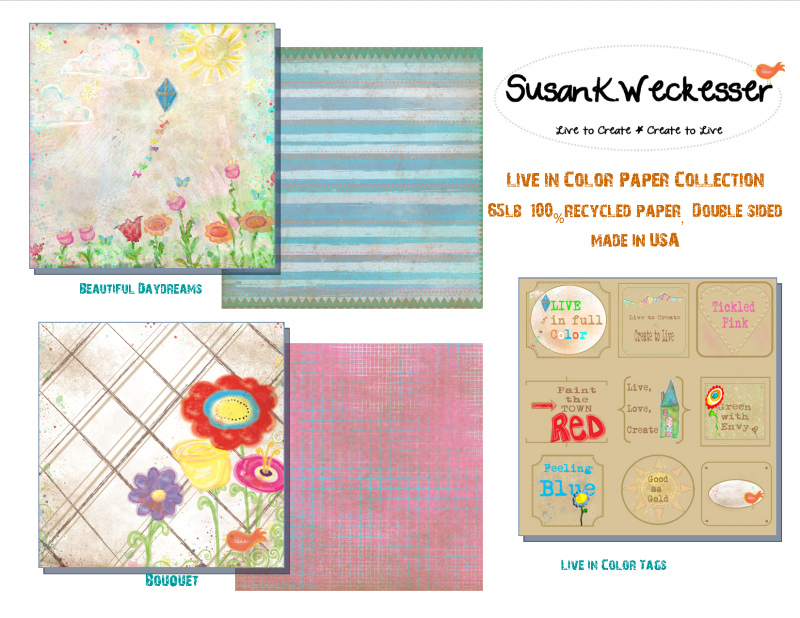
Susan K. Weckesser's papers just scream summer, bright and cheery and perfect for putting a smile on your face.  I played with the layers of her "Beautiful Daydreams" paper, placing a full 12x12 paper into the size of an A4 tag.  I took bits from each element (sun, could, kite, and flowers) and layered and used foam dots to create dimension of a lady walking through a garden on a summer day.  I then back it with Susan K. Weckesser's "Live in color" green side paper and used lots of ink and Ranger Stickles to make things pop!!

http://www.susankweckesser.com/susan_k_weckesser_incproducts

I did a ton of fussy cutting, some layering on top, and some behind the main section of the tag and the lady.


I used the stunning lady stamp called "Poised and Pretty" from Susan K. Weckesser.  I used the cute little hat and jumper outfit and stamped it with Clearsnap Mixed Media Inks in yellow then used Tattered Angels mist in pink.  The ink resisted the mist so it created a wonderful contrast.  I stamped everything in Core'dinations cardstock in beige.  Lastly I took Pitt Pastel pencil from Faber-Castell in orange, yellow, red, and mustard and drew in contrasting colors on the hat and dress.

http://www.susankweckesser.com/susan_k_weckesser_incproducts
 

Don't forget to stop every now and then and smell the flowers, take a day to just enjoy the garden, and the warm sunshine before it is gone!!

Supplies Used
Cardstock - Core'dinations
Patterned paper - Susan K. Weckesser
Stamps - Susan K. Weckesser
Ink - Clearsnap
Stickles - Ranger
Pencils - Faber-Castell
Adhesive - 3M

Enjoy!!
http://scraps-of-reflections.blogspot.com/

Thursday, April 24, 2014

Farewell...Thanks for all the Memories

Hello Creative Lovelies. 

It's Keri here on The Sweet Life Blog...for the last time. {single tear} 

More on that later...on to my PROJECT!!

I couldn't finish my term with Susan without a sentimental farewell...


This little piece is a jumble of my favorite Susan K Weckesser Stamps from Unity Stamp Company along with a lot of mixed media fun.

Here's a breakdown of a few steps:


My background started with Susan's "Splatter It" stamp and Distress Ink in Pickled Raspberry on a small canvas. I then took some yellow and teal Tattered Angels Baseboard to add some color. 

(I forgot to take a picture of this part.) I then laid a piece of lace over the top and lightly spritzed through it with a dark black Tattered Angels Glimmer Mist and layered a few pieces of colored drywall tape on my canvas.


To add some texture and shimmer, I took the puchinello style stamp from Susan's "A Little Bit of Washi", stamped it with Tim Holtz Embossing Ink and Ultra Thick Embossing Enamel (UTEE) in gold. 


To make my silver dots, I just used my finger tip to stamp with embossing ink and used silver UTEE. My circles were made by dipping the bottom of my Tattered Angels Glaze bottle in some Tattered Angels baseboard that I had sprayed on my non-stick mat and stamping it on my canvas. 

To Make your textured heart, follow these 4 easy steps (this is one of my FAVE techniques!)


(1) I started by painting my chipboard heart white. (It had a pattern on it.)
(2) Next, I smooshed my heart into my embossing ink and added a layer of UTEE. Heat to melt. 
(3) Let it cool and repeat. I used silver the first time and bronze the second. (Depending on how detailed your stamp is, you might want to repeat a third time.)
(4) While your final layer of UTEE is still hot and liquidy, tap your stamp into an ink color of your choice, place your stamp on top of your piece and lightly press down. I used Susan's "In Circle Me" Stamp. Don't use too much pressure or your stamp will slide. Lift it off and voila! A yummy textured embellishment. 

Here is a close-up...you can see the two toned colors better: 


So there you go.

My final project for Susan.

She and I did the math and between being a guest designer and design team, she and I have been together for the last year and I have loved every minute of it.

Susan, Cheryl and the whole team are truly some of the most genuine and supportive people I have ever had the privilege of meeting in the industry.  

I will greatly miss typing these little blog posts to you all twice a month. I hope I have inspired your to create some thing new and maybe challenged you to step out of your comfort zones...even just a little bit. 

As I always say...and I will say one last time...Make your art a choice...not an after thought. 

XOXO,
KERI

Wednesday, April 23, 2014

Happy

Hello everybody!

Emmy here today with a new project to share. This week I created a card, which you can use for every occasion, because it just makes you HAPPY:


Using Susan K. Weckesser products always makes me HAPPY, so I thought this sentiment will be perfect for my card. 

I added a lot of layers to my card using Susan K. Weckesser Whimsical Papers and cardstock.


I used white base for my card, which I altered with Susan K. Weckesser & Unity Stamps "abc.123.washi" stamp set. After the ink was dry, I sprayed my background with brown and orange Glimmer Mist.


For my card I used different frames and the birdy journalling spot from the Susan K. Weckesser "Live in Color Tags" pattern paper. I stamped on my second layer, using the numbers washi from the "abc.123.washi" stamp set


I hope you enjoyed today's post!

Come back tomorrow for more inspirational posts from our design team!

Emmy


Monday, March 3, 2014

Mixed media tag


Hello there, it's Jaine here again and this time with a tag for a little bit of inspiration. 

Our theme for this month is Mixed Media, a subject very close to my heart. I'm a mixed media type of gal deep down and like to show it when ever and where ever I can. So here I've created a tag and I've taken photo's along the way to show you the many layers.


I started off with a Ranger tag and covered it with some Canvas Corp. paper. This swirly red one is so cute.


Next, I decided I was going to add some more colour to the tag but I still wanted to keep some of the pattern in tact so I added embossing ink through a stencil with a sponge and embossed in clear powder to create my resist. The stencil is a home made one cut from a piece of acetate. 

It's a bit hard to see it properly but all will be revealed!


 I sprayed on Tattered Angels Chalk board ink in red, blotting off the ink from the embossed parts. I love the fact that I can still see the red pattern through the ink, it didn't hide it at all.


I expect you're wondering how I managed to stamp Susans little birdie from Sing your Song stamp set from Unity, looking the other way around? well, I stamped him onto a piece of tissue with a Versafine ink, cut it out then glued him back to front on a piece of copy paper. The tissue just disappears leaving the bird image behind.


I added a few spots of colour with marker pens.


I finished off with a few spots of Stickles and some felt at the top.


Bring on the Spring

Jaine for the Susan Weckesser Design Team.
x

Wednesday, February 12, 2014

Let's get "Tickled Pink!"

Hello Creative Friends!

Keri Here...I'm so excited to share my Mixed Media Canvas called "Tickled Pink."


I wanted to do something little different with Susan's In Circle Me stamp for Unity Stamp Company

So I decided to try stamping it into an almost dry layer of modeling paste I had spread along the edge of my canvas. Here is a close-up of the "naked" boarder:


The key to making this technique work to do allow your modeling paste to dry (naturally or using a heat gun) until it is no longer sticky anymore, but still move able. Work in small areas and clean your stamp as soon as you are done (Modeling paste is a BUGGER to get off once it's dry!)

Here are a couple of close-ups:


Want some more details? Check out my blog: The Creative Life Studios for step-by-step instructions and more pictures. 

Until next time friends...choose to make your art intentional...not an after thought. 

xoxo,
KERI


Thursday, January 23, 2014

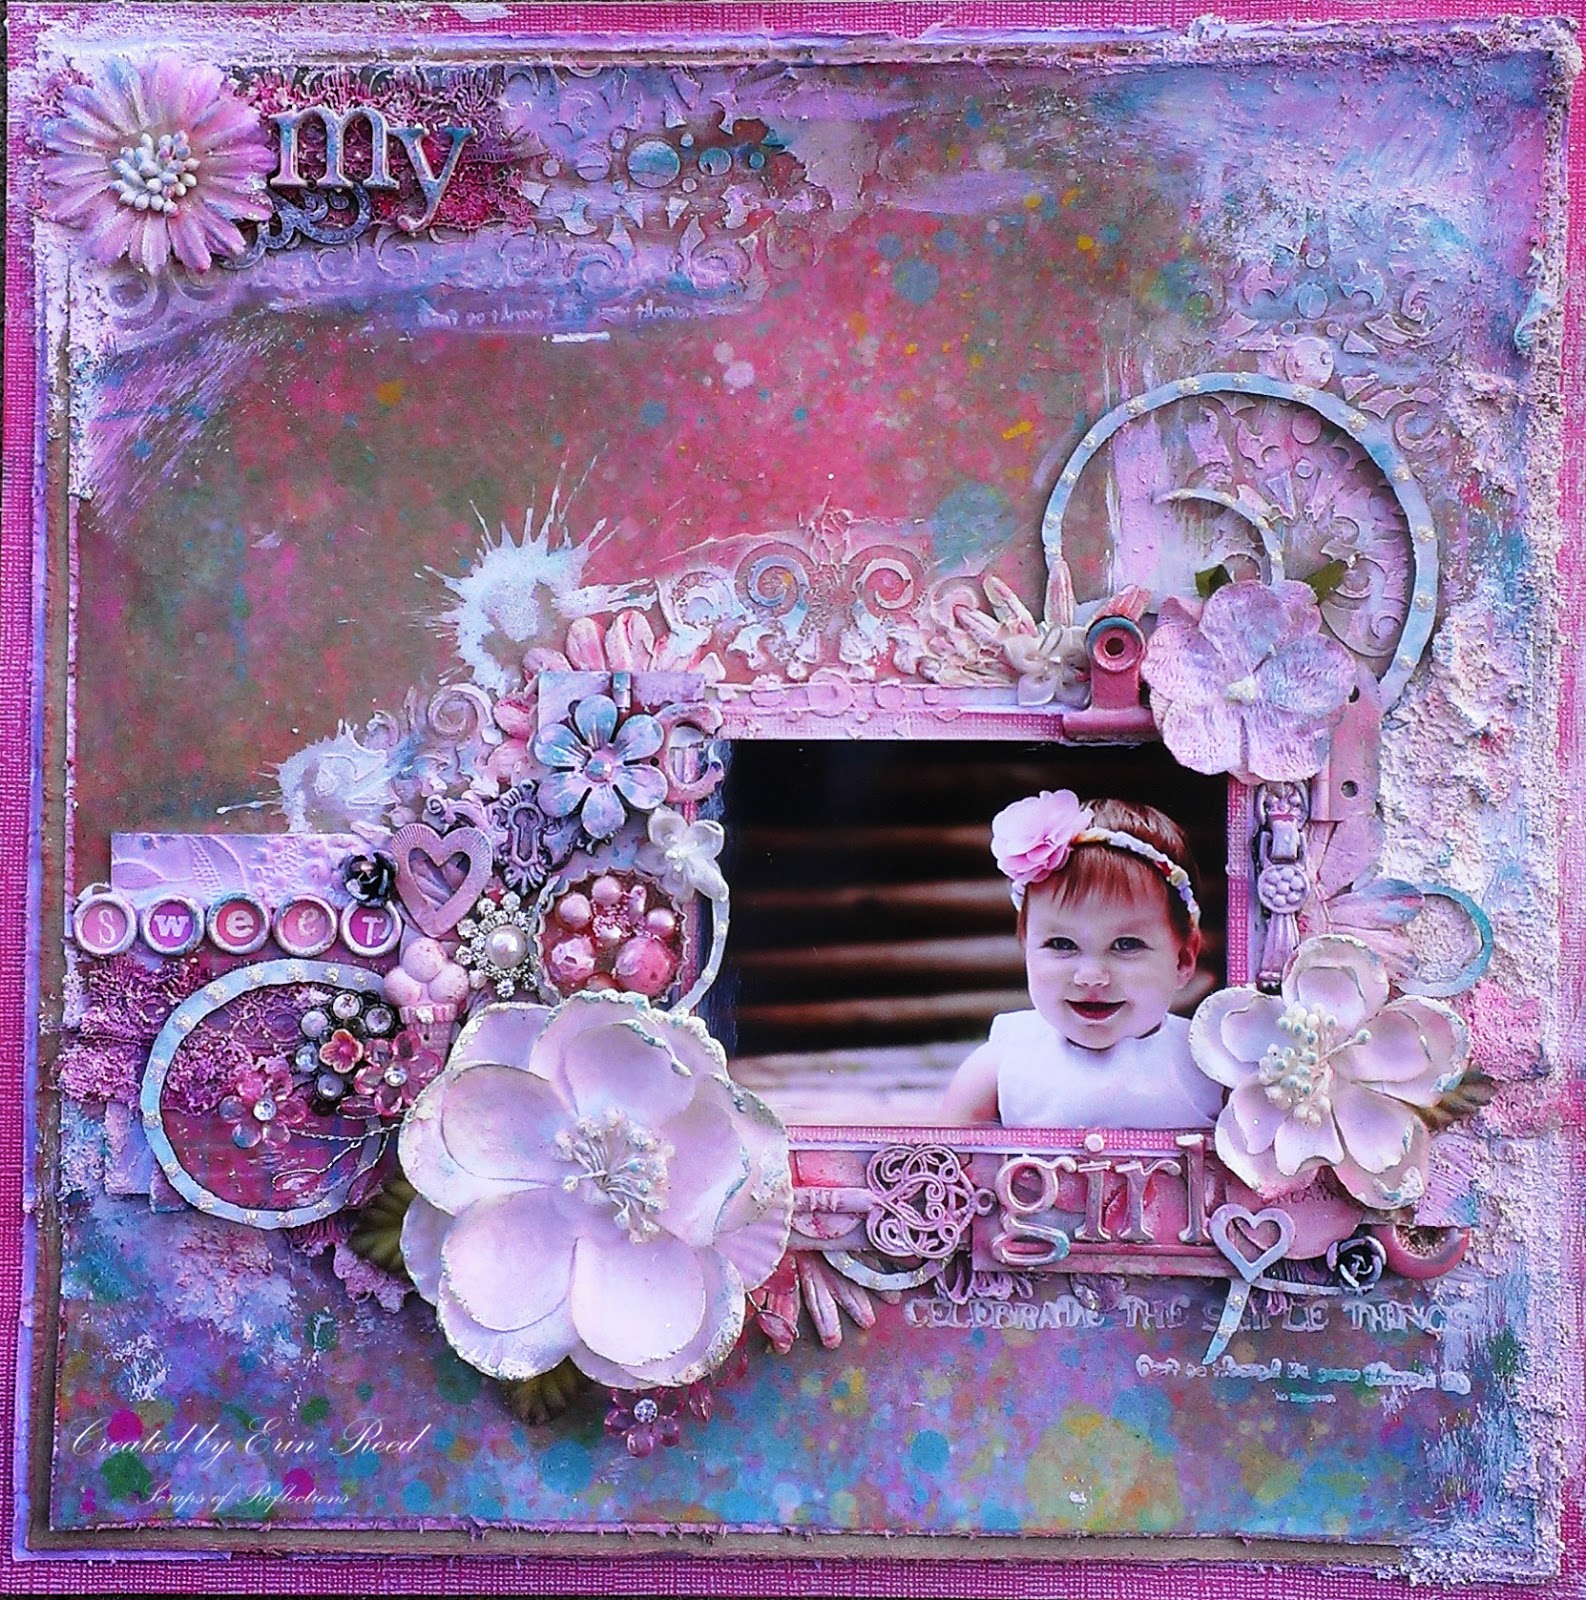
my sweet girl

 For Catherine's first birthday we had a few pictures taken by a friend, and they turned out wonderfully.  This is one of the beauties that came out of that shoot.
 

I love the look of mixed media, playing with your embellishments, creating texture, looking around the page at all the fun different items, but never taking away from the picture itself.  That is part of the art, not letting the page "eat" the picture, but letting the page enhance the picture.  

Below is my methodology of how I build a page - a peak into my head so to speak.  Sorry for the lighting on some of the pictures, I did not always have the best light available as I was building my page.
How to Build a Mixed Media Page

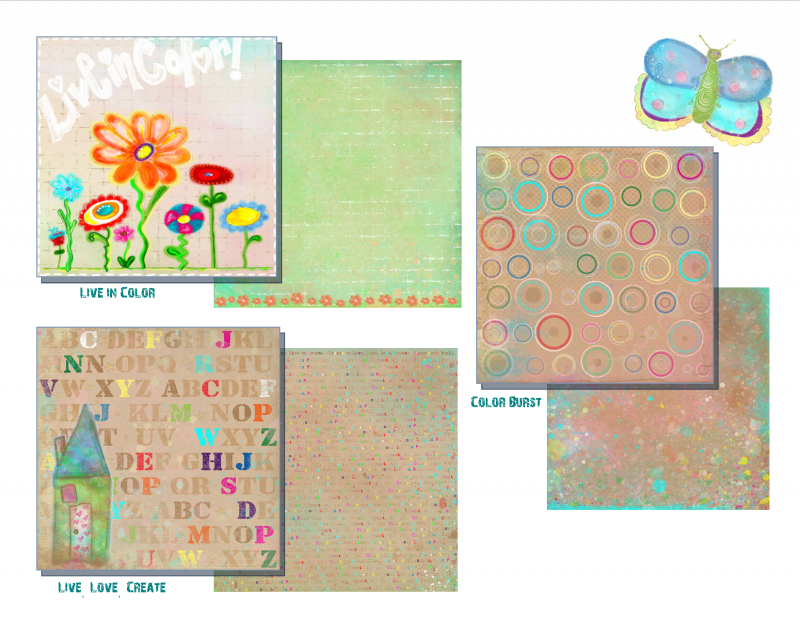
 1) I start with the papers.  I look for papers that correspond to my picture, I want to complement it, not fight with it.  I used my daughter's hair bow (since the rest of the picture is brown, flesh, or white I used those colors (pink, teal, white, etc).  The papers from Susan K. Weckesser were a perfect match, they just begged to go with this picture.

http://www.susankweckesser.com/welcomehttp://www.susankweckesser.com/welcome
 The "color burst" paper was perfect for the background, and then I added in the "bouquet" and "beautiful days" as layers.

2) I this point I have a sketch in my head of the design of the layout, I know I wanted the picture in the middle right, with elements going above and to the left of the picture.  I start pulling items that I think will work on my page, not caring about color, just the shapes.  Not all the items will make the cut and be used, but this gives my an idea if I like where I am headed.  Nothing is glued down, it is just my rough idea at this point.


3) I apply gesso to all the embellishments that need a change of color (except for the top lace it was white so it took color no problem).  The spray them with spray mist.  I used Tattered Angels mist in a couple of different shades of light pink. I mist them each 2-3 times to give them a good coat.  I also let them dry before each coat so they absorb the mist better.  I do this off the page so I do not apply to much mist to the background papers.


4) Now I add texture to the page.  I used stencils by Prima with gesso, added in my papers (distressing each layer of paper with scissors and edging them with ink) and trims, and for fun I added in layers of Snowtex.  I gives this wonderful bumpy texture.  I even took a couple of Susan K. Weckesser stamps and stamped in gesso below the picture and in the top left corner below the lace and stencil area.  I used two small phrases found on the stamps sets below "Celebrate the simple things" and "Don't go through life, grow through life"

http://www.susankweckesser.com/welcomehttp://www.susankweckesser.com/welcome


5) Now I start to add my embellishments back on.  I do not have the picture glued down yet, as I might still spray and I don't want to damage my picture.


6) I start to glue down items as I like to way the looks in that location.  I sometimes take pictures and step away for the page to see how it looks a hour later (especially if I am waiting for something to dry).


7) If I feel there are dead or blank areas, I will either add in another embellishment (or two) or add in more texture.  I did this just above the picture, it felt it was missing something so I added another bit of stenciled gesso.  I also sometimes move things around or change the item completely.  I just let the page go with the flow.  I don't fight to make it work, because I find it never looks good if I do that.


 8) One of the last steps is to go over the gessoed embellishments one more time with paint or chalk ink, sometimes both.  This help them pop out of the page a bit.  I might even add a bit more gesso to the items so they don't look to pink. it adds contrast.  I also leave some items plain, or without gesso like bling and such.  On this page I also added on some glitter via Stickles from Ranger in Crystal for a bit of sparkle.


 9) You can see some of the texture and the Susan K. Weckesser Stamp


Supplies Used:
Cardstock - Core'dinations
Patterned Paper - Susan K. Weckesser 
Flowers - Prima and Petaloo
Media - DecoArt, O'Leary paint, Liquitex,
Paint, Mist, Sprays, glitter - Ranger, Tattered Angels, Martha Stewart
Metals - Prima, Momenta,  and Other
Chipboard - Memory Maze
Stamps - Susan K. Weckesser
Mask - Prima
Trims and Lace - Other
Found Objects - Other

 Enjoy!!
http://scraps-of-reflections.blogspot.com/
 Erin Reed Design Team Member
ShareThis2

BrendaPInnickColorCafe