Showing posts with label Fly Away stamp. Show all posts

Saturday, November 12, 2016

Imagine the Possibilities


Hello! Katy here with today's tag project. I decided to create an inspiration tag using Susan's stamps and inks.

Here's how I made it:
1 Pat an acrylic block with Colorbox Color Pop Ink in Sky. Spray the block with water then 'stamp' onto a tag made of mixed media or watercolour paper. This create the washy watercolor-effect background.
2 Stamp three clouds in Sky and over-stamp in Ice with the Grunge Fun dots stamp. Cut out and add to the tag, overlapping.
3 Stamp the kite onto the tag in Cocoa ink and again onto card in Kiss ink. Colour with markers and cut out and layer the kite head and he bows.
4 Stick a quote (freebie from Mixed Up magazine) and outline it in black pen. Add faux stitching to the tag edge also with black pen.

Imagine the possibilities and reach for your dreams!

Katy x

Susan K Weckesser products used:
Susan K Weckesser/Unity Stamps: Fly Away
Susan K Weckesser/Jillian Vance Stamps: Grunge Fun
Susan K Weckesser/Clearsnap Colorbox Color Pop Inks: Sky, Ice, Kiss, Cocoa

Tuesday, October 4, 2016

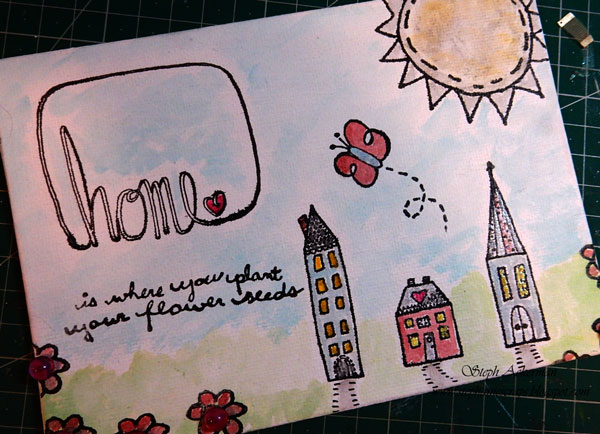
Home Canvas Panel

Hi everyone, Steph here today.  Can you believe it's October already?  This month it's all about mixed media so I've created this cute Home Canvas.


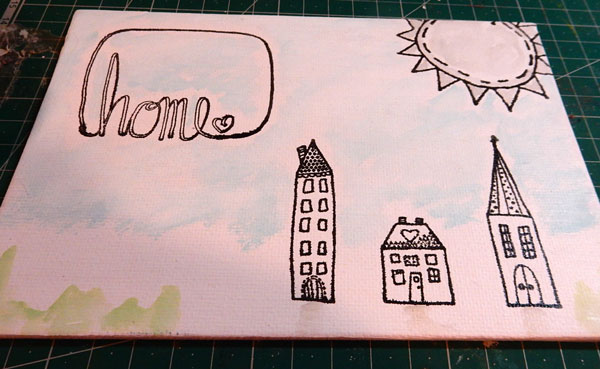
I've started by stamping an assortment of Unity stamps from the Tumbleweed Houses and Fly Away stamp sets.

 
Using  Colorbox® Color Pop Archival Dye Ink by Susan K. Weckesser in Mystery, I stamped all the elements on the panel.
 
 
Using a waterbrush, I then used  Colorbox® Color Pop Premium Dye Ink by Susan K. Weckesser.  I brushed in Ice Ink for the Sky, Fresh Ink for the grass and Cocoa Ink for the pathways.


I stamped the butterfly and flowers from the What's Up Ghomey? stamp set, coloring them with Kiss and Ice.  Then I continued brushing in colors to finish the canvas. 

 
I used some Clearsnap Smooch Accent Inks to add color to the windows and flowers.  Finally I stamped the phrase with Mystery ink, masking off the first few words.


Thanks for stopping by today.

Steph Ackerman
for Susan K. Weckesser


Monday, August 22, 2016

Sunny Journal Page


Today I've created a journal page that's a homage to our wonderful Creative Team leader, Susan K. Weckesser herself. Susan is quite the most positive, upbeat and optimistic person I think I have ever met. So my words on this page remind me that she always sees the good in every single day including the bad, hard ones; even on the darkest days, the sun still rises. Thank you Susan for being an inspiration!

It's quite pared down (for me anyway!) as I wanted the beautiful stamps to take centre stage here. I really love both sets I used here!

Susan K. Weckesser Inc products used:
Fly Away stamp set by Unity
Grunge Fun stamp set by Jillian Vance
Colorbox Color Pop Inks: Ice, Sky, Mystery, Snow

Here's how I made it:
1) Repeatedly stamp the dots from Grunge Fun in Ice ink onto a journal page. Apply the stamp randomly without using an acrylic block, as you don't want full coverage. Repeat using Sky ink, but more sparingly, and using the second impression to get variations of colour tone.

2) Ink a piece of card with Ice ink and stamp two clouds with Sky ink. Cut them out. Stamp the sun onto painted card with Mystery Ink, heat set, cut out and add some additional colour with an orange pencil. Sponge the clouds with a little bit of Snow ink to make them look 'fluffy'.


3) Stamp the clouds and sun onto the background with Mystery ink and glue the cut out images over the top. Extend the strings with black pen as necessary.

4) Hand write your journaling as desired (tip - I can't write nicely so I pick a lovely font, print it off on thin printer paper, trace it with pencil onto my page then go over it with permanent pen. It looks like I wrote it! Yep, I cheated folks!)


I hope you like my journal page and that you've had a sunny day today :).

Katy x


Saturday, August 13, 2016

Home and Rainbows Journal Pages

Hi everyone, Steph here today and I have journal pages to share.


The pages in my journal are kraft colored, so I first added gesso randomly about the pages.  I wanted some of the kraft cardstock to show.  On the left side I stamped the cloud from the  Fly Away stamp set and home from Little Have stamp set using Black Color Pop Ink.  The Tumbleweed houses were also stamped with Black Color Pop Ink and colored using a water brush and additional Color Pop inks.  Randomly across the bottom, I painted additional colors.  As I had a little room, I stamped a portion of a tree from the At Ground Level stamp set.

 
On the right side, I swiped 3 colors of ink across the page simulating a rainbow.
 
 
From the Unicorns and Rainbows set, I added several elements.


Thanks for stopping by today.
 
Steph


Tuesday, July 26, 2016

Owl's House


Hiya all - Katy here with today's make. I'm continuing the home theme with my little house that's inhabited by this charming owl! Wol is from one of Susan's new Unity releases, Going Wild- isn't she adorable?

Susan K Weckesser products used:
-Unity stamp sets: Going Wild, In My Garden, Fly Away
-Jillian Vance stamp set: Grunge Fun
-TCW Doodle Stencil
-Colorbox Color Pop Ink: Cocoa, Sky

The little house shape was pre-cut MDF and it's been sitting in my 'things to alter' box just waiting for this theme! I started by painting it with chalk paint to give an nice smooth stamping surface.


I stamped a background using the dots from Grunge Fun and yellow ink then stamped the leaves and flower heads from In My Garden. I also stamped a little branch for Owl to sit on. Owl is colored with alcohol markers then cut out and added on foam pads.


I used a Hydrangea StazOn for the flower heads and filled in the dots using the end of an embossing tool dipped into magenta paint.


The roof is made using Susan's stencil to make a scallop which I filled with Colorbox Color Pop ink in Cocoa (it went a lovely warm grey over the chalk paint). I added doodling and dots for detail. I also stencilled a little border along the bottom edge in the same color (see main pic) for balance.


Finally I stamped the cloud and sun from Fly Away. The clouds are stamped with Sky ink and textured with the Grunge Fun set. The sun is coloured with alcohol markers.

Hope you like my happy little house project.

See you soon!
Katy x

Doodle Stencil

Fly Away

Grunge Fun

In My Garden

Going Wild

Saturday, July 16, 2016

Home Sweet Home Canvas


Hello everyone! Katy here making my debut on this fabulous Design Team! My first project is a small canvas which would make a great new home gift. I used a mix of paper piecing and stamped images onto a background created with inkpads. I really like the whimsical feel of this piece with it's naive style.

Susan K. Weckesser Inc. products used:
I've created a quick process video showing you how I used the Color Pop Inks to make a background on my canvas.


My little houses are paper pieced from Susan's gorgeous patterned papers. The doors and windows use stamps from the Grunge Fun set and I used the same set to add texture to the houses and roofs. Each is finished with a tiny stamped heart.

The clouds are stamped onto white card with Ice ink, patterned with the Grunge Fun spotty stamp and cut out. Similarly, the sun is stamped in Kiss ink onto an area of one of the patterned papers.


I finished with some letter stickers and little brad doorknobs to embellish. The sides are decorated using just part of the kite stamp from Fly Away to create a repeat pattern.


I hope you like my very first project! It was a lot of fun to make.

Best wishes,
Katy x

Created by Katy Leitch
For the Susan K. Weckesser Creative Team

Fly Away stamp set


Grunge Fun stamp set

Monday, July 4, 2016

A SWEET Home Decore Idea Using Sharpie Markers...

Happy Daaaay Everyone!  Lynne here today sharing my first project for the new Susan K. Weckesser Creative Team.  I am so honoured to be a member of the 2016-17 team and super excited to share my latest creation, which is something a little bit outside of my usual offerings.
This July we are celebrating our Homes so I decided to alter this canvas wall hanging I have been saving (hoarding?) for several years with the intention of hanging it in a corner of my new studio space where I like to sit and use my paints, draw and color. 
Now just so you know, I don't usually "DO" home decor items. Don't get me wrong, I LOVE to decorate my home but with stuff other people have made, because my feeble attempts at making my own usually fail Big Time (grin).

But because this project was so simple and required no special skills or power tools, just some  ink, some stamps, my Sharpie markers and Ranger Stickles and Liquid Pearls... I think it turned out Beauuuutifully... Smile.
I used several of the Susan K. Weckesser Unity Stamp sets to create this super sweet, colorful and happy hanging,  (all listed below) and I have created a photo tutorial HERE on my blog if you are interested in seeing the entire process in more detail.  I do hope you like what I created for my first project for this new term and that it inspires you to create something of your own to honour your "Home Sweet Home".

For the Susan K. Weckesser Creative Team

Susan K. Weckesser Stamp Sets used for this project:
At Ground Level

Fly Away

the Happy Homestead

What's Up Gnomey?

Other items used for this project:
Sharpie Markers
Ranger Stickles & Liquid Pearls
Ranger Archival Ink


Thursday, May 12, 2016

It's An INKY Feast For the Senses!

It was  my pleasure to be one of the first people to use and review the new Susan K. Weckesser inks by Clearsnap: ColorBox Color Pop Minis 

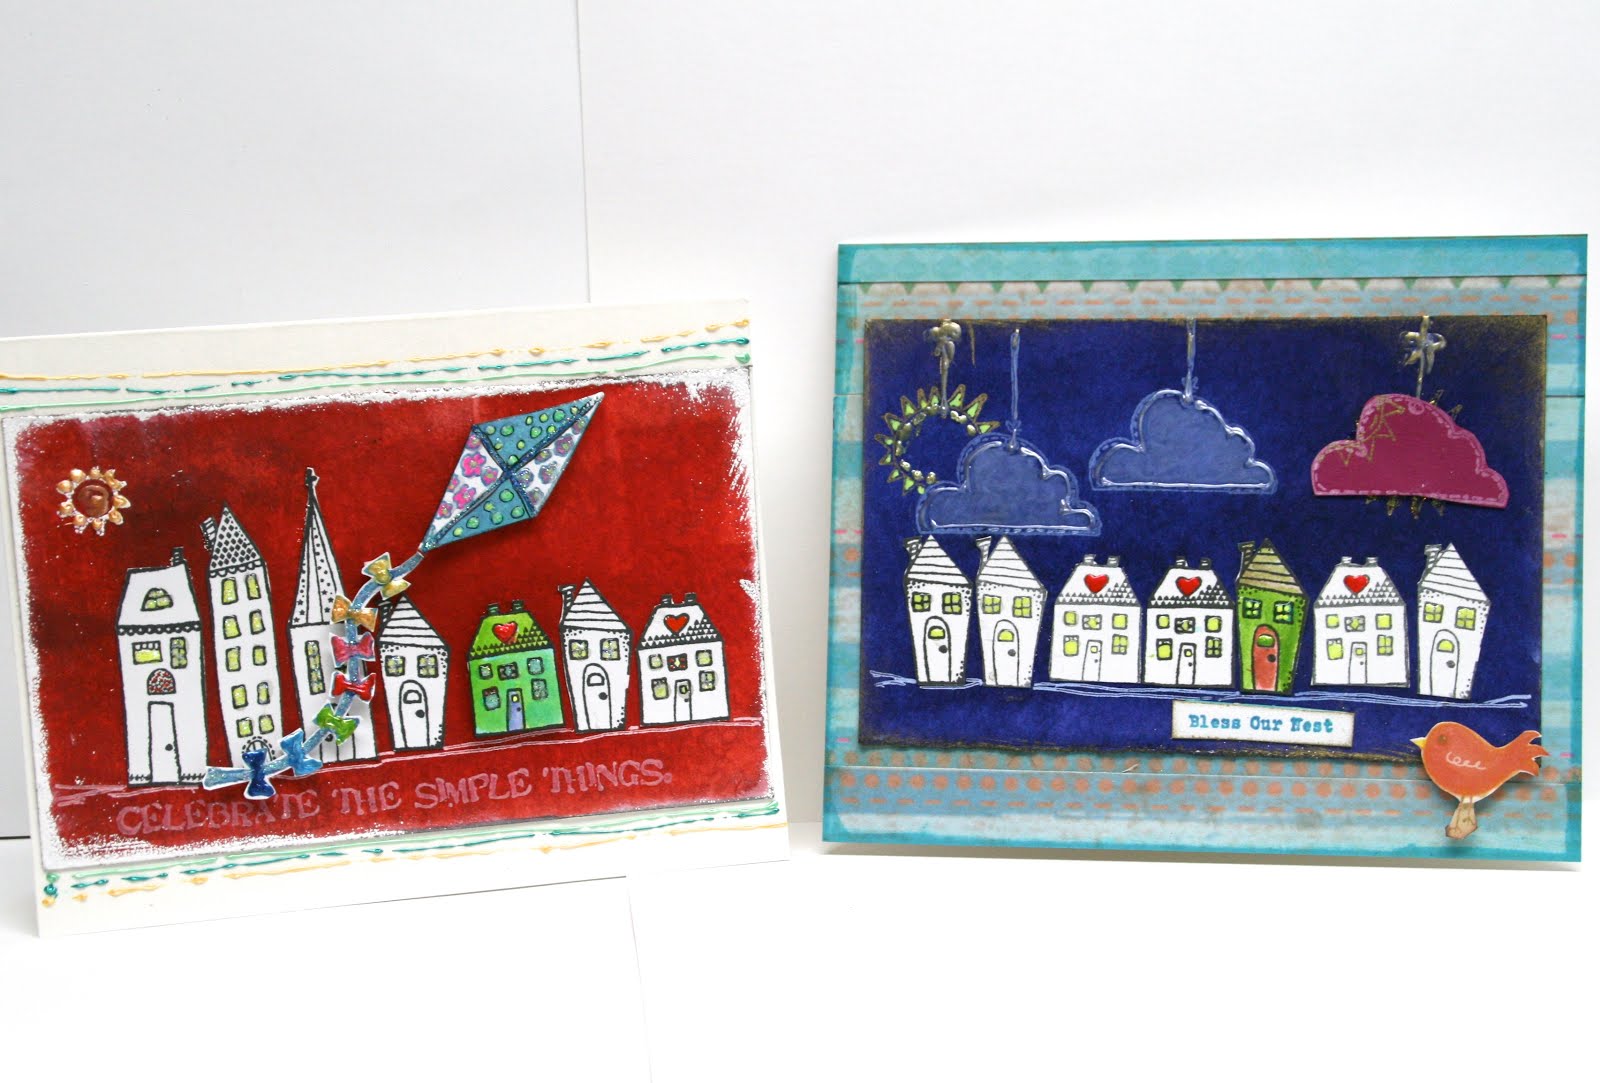
Here are the two cards I created using these inks...

And here is my review
I LOVE them!  Grin 

These are all the things I love about these inks:
The 1"x2" size is perfect, small enough to easily have within reach but large enough to handle most stamping jobs.  The Lid fits snugly so the ink won't dry out and it does not come off when I throw them in a basket (which is my usual modus operandi).
The dye ink colors are vibrant, both when they go on and when they have dried (not always the case with some inks) and they blend beautifully with water - again without fading!
The pigment ink is thick and opaque, just the way I like it, and takes a while to dry unless you use your heat gun - all Good qualities in a pigment inkBut the Metallic ink... Swoon!  Seriously, the best metallic, pigment ink I have come across to date and I have used a LOT of them!  This ink dries metallic and looks like I used metallic paint - which is what I have resorted to since I have been unable to find a metallic ink that still looks like metal after it has dried - that is until NOW!
And now for the fun stuff.  Because I was trying out a new product I wanted to use these inks in a few different ways and I took photos along the way so you could join in... I hope you enjoy this mini card class and a peek into my creative process.
 
I decided to ink the background of my cards and then use the white pigment ink to stamp right onto the dark background.  For me THIS is the true test of a both a dark dye ink and a white pigment ink.  will the dark ink stay dark?  And will the white ink be opaque enough to show up and not fade away?
Not only did both inks pass, but I needed very little of the dark blue ink to create a wash on my background... I used way too much! Grin
Then I stamped right onto my background (after the ink had dried of course) with white and gold pigment ink.  I used a masking technique to make the sun appear as if it was coming out from behind the clouds.
You can see how the pigment inks stay crisp and bright and how the background ink is still dark even after drying.  Then I did something CRAZY!  I used water with my white pigment ink and added a light wash to the clouds... This NEVER works for me with pigment inks and yet here it is!!
Then I stamped a whole bunch of tiny house images onto white 100lbs card stock, grabbed my water brush and started painting in the houses. I used Archival waterproof ink for this part since I knew I wanted to get my images wetThese dye inks acted like a watercolor paint and blended beautifully.  They worked so well I went and grabbed another of my ColorBox dye inks in yellow, (Not the mini pops 'cuz NO yellow) and it did not work at all!  So this confirms for me that all inks are NOT created equally!
And then I did the same sort of things for the second card in Red...
 
The rest of the photos are all about design and embellishing... using my very favorite techniques of fussy cutting and popping the images, and then using gel pens and Stickles & Liquid Pearls to enhance the card.
Then of course you have to mount the card image onto a card base...

What I love the most about these two cards is how the ink stayed dark and vibrant so the white, un-coloured houses I stamped just jump right off the page... but then that one coloured house becomes the focal point... 
Yup... Great product and wonderful inks. My one suggestion, MORE Metallic Colors and I NEED a yellow dye ink! Grin
for the Susan K. Weckesser
 
The following are a list of stamp sets and products I used for these two "simple" cards... (She says Grinning Madly!)

Susan K. Weckesser/Unity Stamp Sets Used on this Project:
Create Your Day
Celebration of Simple
Tumbleweed Houses
Fly Away
SKW Cardstock - Beautiful Day Dreams
 
ColorBox Color Pop Mini inks
Ranger Stickles and Liquid Pearls
Sakura Gelly Roll Pens
Tsukineko Clear Embossing Powder


ShareThis2

BrendaPInnickColorCafe