Thursday, May 9, 2013

It’s a Mother’s Day Sale and a Giveaway!

photo (5)Woohoo!!!! Guess What!? Want2Scrap is having a GIANT sale this week-end!

9293f2de4e0b029ed059abf1d1a04813[3]

And guess what!? Want2Scrap carries my super duper think, colorful, and double-sided scrapbook paper!!! I LOVE my paper because not only is it super colorful and full of my hand-painted watercolor designs, but I had it printed on RECYCYLED and UBER-THICK paper that is awesome for inking, painting , scrapbooking, crafting, paper crafting ,and doing almost anything with it!!! And you know I love doing LOTS of things to my paper and craft supplies!!!! So if you want to try some of this fun and COLORFUL paper…..this is an AWESOME week-end to try some! The sale at Want2Scrap is going on HERE!paper pics_thumb[4]    Slide1.302194558_std

I LOVE how the color is neutral, with POPs of wonderful bright colors! It makes me {SMILE}!

MothersDaySale (1)

If your would like to get a stencil to go play with paper line, you can find my Crafter’s Workshop Stencil HERE.

il_fullxfull.374031465_atgm

And don’t forget my fun and easy to use Susan K. Weckesser Inc. stamp kits which can be found at Unity Stamp Company.

121-susan-k-weckesser-new

A list of other wonderful store that carry my Susan K. Weckesser Inc. products can be found on my website HERE.601362_4616143080117_1123027655_n

{My Mom and I in Leduc , Alberta}

I hope that everyone has a lovely Mother’s Day this week-end! I LOVE Mother’s Day! It is such a precious day. It has been so cute this week as I have wandered into different rooms a couple times and interrupted my kiddos whispering ‘plans’ to each other for the week-end. It fills my heart with such joy to know that they care for me enough to plan…even though throughout the years I have disciplined, taught, and even lectured. But then…doesn’t a Mom do it all? Isn’t she a friend, doctor, caregiver, teacher, disciplinarian, chauffeur, coach……a MOM. Even though my Mom won’t be here this year for the first time, I look forward to this day because it truly is a day of LOVE and Caring and showing some Mom somewhere that you care! 

IMG_2176

IMG_2171

IMG_2200

So….. My little gift to you ……. A Home: stamp that is! I LOVE using these large stamps! You can do so much with them from mixed media, to layouts and fabric design and home decor!!! WONDERFUL!

 0002538_0-570x373


Leave me a comment at the end of this post & let me know what your favourite Susan K. Weckesser Inc. product is. Someone will end up getting one of my BIG Home stamps and one of Tim Holtz containers of Distress Embossing Powders from Ranger. (color might be different) So much fun!!!

lgpics_DistressEPNEW


Oh , and don’t forget that we have a Guest Design Team Call going on right now. You can find out all the information HERE!

Good Luck and Happy Creating!!!

hugs,

Susan

Wednesday, May 8, 2013

Susan K.Weckesser Inc. Guest Design Team Call

Guest Designer Call

We look forwarded to spending a little time with you!

hugs,

Susan xo

438

Monday, May 6, 2013

Singing in the Sunshine!

Hello, this is Julie from Australia where next Sunday will be Mother's Day.


My piece today is a Memory Tin.
My beautiful, crafty Mum has been gone five years now.
She gifted me with a wonderful treasure trove as she was a saver, recycler and collector of all those,
"I know they will come in handy pieces!"
For this project many of her bits and bobs were perfect.
Here's a how to.
1. Brush the tin with a couple of coats of Gesso
2. Gather together the bits of memorabilia you want to use.
3. Colour a piece of interfacing with inks
Then 
4. Stamp the wonderful bird from Unity "Sing your Song" using Archival Ink.
5. Cut into a heart shape and apply to the tin using gel medium.
6. Pile on the lace, fabric pieces and embellishments and cover liberally with Gel Meduim.
7. Colour to your hearts delight with any and all the mediums you like to use.

The frame was made using a Spellbinder Die, thin metal and Vintaj Finish.
8. Add extra colour with Perfect Pearls and Viva Decor Inka Gold.
9. Take your time doing this as the finishing stops any potential stickiness.

Make the back of the tin in the same way.

Now what could I use this for?

On the inside I used alcohol inks for a fairly simple finish as I wanted my cabinet card to shine.


Serendipity is such a wonderful thing!
As I went delving into my Susan K Weckesser Papers I found the perfect scrap with a whimsical sun to use as a frame behind the strong black and white image.
The finishing touch was to tuck one of Mum's handkerchiefs in behind her portrait.


I miss my Mum's happy go lucky attitude and incredible creativity.
My memory piece I am sure she would love.
She would be smiling at the idea of gel medium on the lovely laces.


The little blue Bird of Happiness reminds us to enjoy 
every moment 
of 
every day.
Julie

Thursday, May 2, 2013

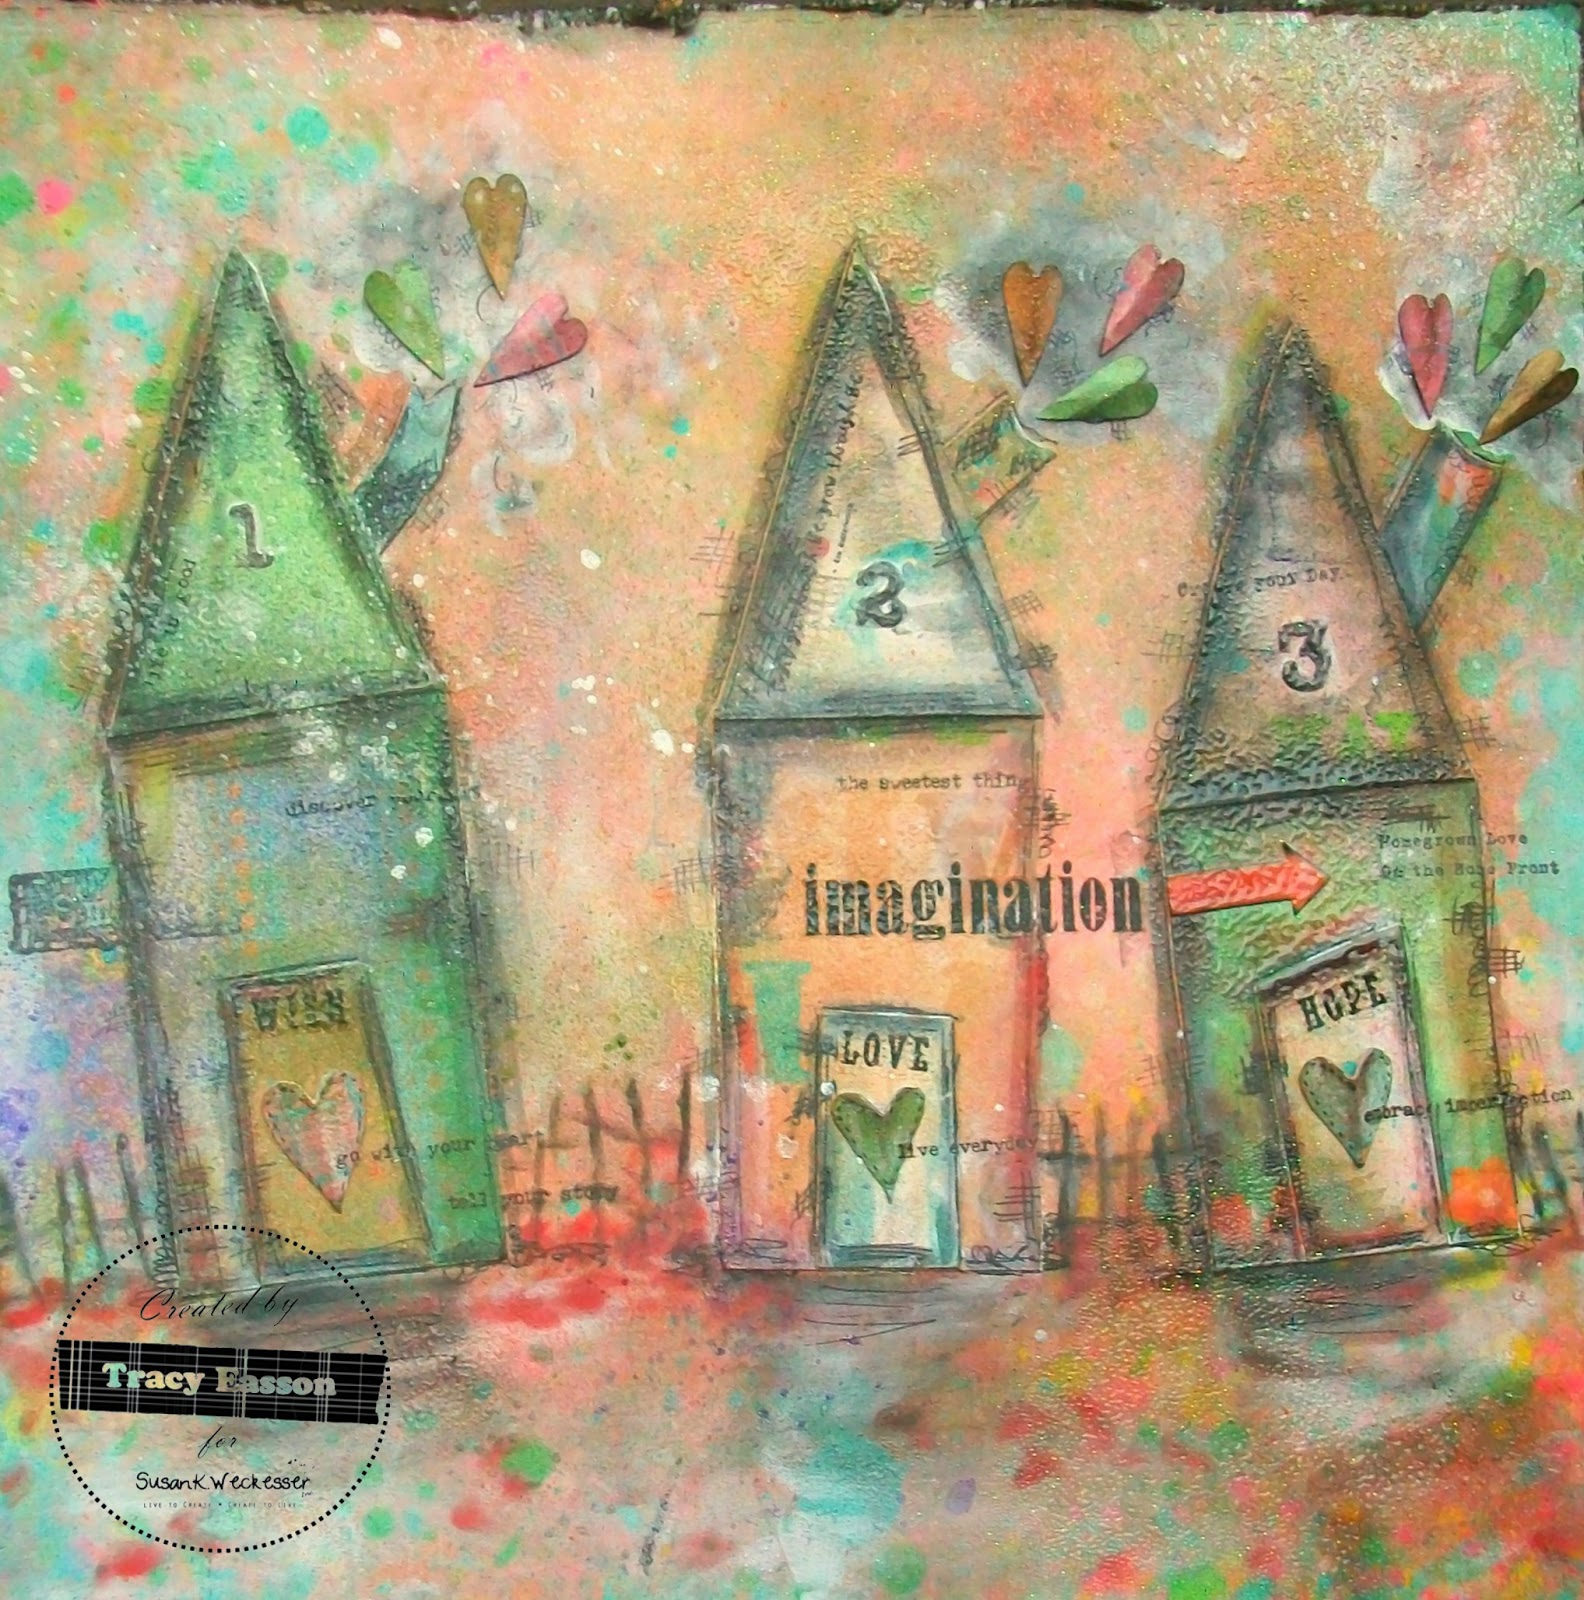
Imagination . . .

 Hello everyone, Tracy here today with another project you can all create with
 a sprinkling of imagination ...
leftover scraps of pretty papers 
paints, inks, stamps, embossing powders, stencils
and a need to get
inky, paint splattered hands ... bliss!!!
To get started I pulled out a box from my stash, full of scraps from
Susan K Weckesser`s Whimsical paper line
I was over the moon to find a 12x12 Color Burst Sheet not even touched ...woohoo ...which became my starting point, followed by scraps chopped up into house shapes complete with wonky tonky doors and chimneys.
Can you see how the background paper already has beautiful splats of color ...
I fixed the houses in place with Inkssentials Glossy accents and scribbled all around with a fine black liner pen.
I do love to scribble!
 I used Susan K Weckesser Inc/Crafters Workshop Stencil along with some Gesso for the numbers on the roofs.
 More scribbles, blobs of white acrylic paint smudged around with my fingers, Tim Holtz Rub ons and cut out  hearts.
The chimneys are working .... see the puffs of smoke welcoming you home.
A little close up so that you can see the Smooch Spritz sprays I applied in various colors along with
Pan Pastels.
  I also used sentiment stamps from Susan K Weckesser/ Unity Stamp co - Create Your Day set
along with  A Little Bit Washi stamps for added texture.
Not to mention more hearts cut from scraps, churning out those chimneys!
The little hickeldy pickeldy fence was drawn in with a pan pastel tool and smudged for a softer look all round and finished with UTEE and clear embossing powders for more touchy feely textures.
 I will leave you with this little house called " Hope " along with one of the sentiments -

embrace imperfections 

It`s the imperfections that make us beautiful and unique!

Till next time
Thank you for looking
Tracy Easson
Susan K Weckesser Design Team Member 

Wednesday, May 1, 2013

My Ranger U 2013 Adventure

IMG_2041We all need time to create, time to do, time to play, and time to learn.

This past week-end I had the opportunity to go to New Jersey to attend Ranger U at Ranger Ink and let me tell you it was INCREDIBLE!

IMG_2092

And I didn’t even get lost…. much!

(look at all the loops that the airplane took to get there! Holy Cow!)

IMG_2016

RangerU was packed full of techniques and information. Simply AMAZING! I have to tell I have been teaching painting, art, mixed media, etc.  for over 26 years now, and it was SO AWESOME to be the student for 3 {intense} days! It reminded me of when I was studying at University! COOL!

IMG_2048

It was super neat to be surrounded by so many talented and amazing people. Actually, I was amazed to find out that students came from 10 different countries around the world. How sweet is that! I was the only Canadian. Eh! The staff was SO wonderful!! I am sure I don’t have to introduce the instructors….

IMG_2035

Mr. Tim Holtz 

IMG_2023

Dyan Reaveley (dylusions)

IMG_2047

Claudine Hellmuth (studio line)

and… mackie(vintaj) , who dissappeared before I managed to snatch a photo of her! She rocked!!!  Mario,  and the staff; Patti & her team, Jackie, and Charlene were all SO incredibly nice and helpful and I have never seen such a clean and cool plant ever! AMAZING!!! Tim compared it to Willy Wonka’s Chocolate Factory and boy, it really was!!! I wanted to touch everything…but, I didn’t. I behaved!!! Everyone was so much FUN!

IMG_2086

IMG_2087

IMG_2070The Class: Did I mention that it was amazing!

My head is STILL whirling!!!

IMG_2088

  Heehee..I just noticed the heating tool. Do you see what it says?

IMG_2079

{outside the Ranger building. SO pretty}

IMG_2085

70 TAGS + 3 DAYS = A HAPPY HEART

IMG_2081

IMG_2083

IMG_2084

Doesn’t all that color, textures, and patterns just make you feel SO happy! I am smiling as I type this!

IMG_2091

Look what I found on some shelves in the Ranger Inc. Classroom. A little tiny canvas that I had made a year ago for a CHA show.  I was SO thrilled to see it sitting there.

IMG_2020

I feel so blessed to be able to have been able to be part of this amazing event. Creating ART is SO wonderful for the HEART and SOUL and I truly feel charged up and ready to go now!!! Can’t wait to start another COLORFUL ADVENTURE in my Studio!!!

Find a little time to create today…… it really will put a smile on your face!

hugs,

Susan

{The little images, or ‘instaicons’  on my photos are designed by the lovely and talented Rhonna Farrer. You can find them and all kinds of AWESOMENESS at Rhonna Designs. }

Tuesday, April 30, 2013

Mini Sketch Book

Hello everyone!

Today, I want to share a mini sketch book that I created to keep on hand for when inspiration strikes.  Because according to Murphy's Law, when it hits me, I'm usually empty-handed, with nary a pad nor pen handy! :)

Supplies used:  Maya Road chipboard album; Susan K. Weckesser patterned papers and stamps; Silhouette Cameo, Rolled Rose and Flower Leaves files; Martha Stewart Crafts and Marvy Uchida punches; Tsukineko ink; WRMK Cropodile; Offray ribbon; Doodlebug Designs and Cosmo Cricket alpha stickers; Sookwang tape; pencil, mini doily, rhinestones, binder rings and elastic band from stash.

I created the album using an old a vintage Maya Road coaster chipboard album.  I removed the ball chain and used two of the pages for my covers.  Both were covered with patterned paper and double-sided tape - I find when covering large areas, the Sookwang tape is the most resilient and durable.  I then punched small circles and attached to the chipboard, to reinforce the soon-to-be-punched-by-Cropodile holes.


From the patterned paper, I fussycut the "Green with Envy" tag and removed the inner part, leaving a Polaroid-type frame.  I then mounted it on a scrap piece of the reverse coordinating side of the Live In Colour Tags paper, after flicking it with my watercolours.  The title was added and the whole thing was mounted onto the album cover.  I wrapped it all with a satin ribbon and then embellished with flowers and butterflies (of course!), cut and punched from coordinating patterned papers.


The pencil holder was made by folding a short piece of elastic band around the pencil and sewing a loop.  I then punched a circle from patterned paper and attached it to the mini doily.  Using the loop as a guide, I cut a slit through both, using my craft knife.  I fed the elastic loop through the doily/circle and then attached it all to the upper portion of my chipboard, centering it between the punched holes.


The pencil was made by stamping plain copy paper with turquoise ink and the A Little Bit Washi stamp set.  It was cut to length and then wrapped around a mechanical pencil that was covered in double-sided tape.  Easy peasy!


For the inside pages, I wanted pre-drawn squares to use when I am brainstorming sketches for the Sketchy Challenges for Canadian Scrapbooker magazine.  Using Adobe Illustrator, I created the custom pages and printed them out.  Once they were all trimmed down to size, I marked and punched the holes with the Cropodile and bound it all together with 1" binder rings.


Thanks for looking - hope you enjoyed my project!

Cheers,
Sue :)

My Blog:  Kewl Beans

ShareThis2

BrendaPInnickColorCafe