www.susankweckesser.com

Thursday, August 29, 2013

Simple Bag

Hello, Allie here to share a little project I created using the Celebration of Simple stamp set designed by Susan for Unity Stamp Company.

I had some dyed fabric scraps left over from a recent project and I thought it would be fun to make a simple bag. I love to have bags and boxes on hand, because I'm always getting a simple little something for a friend.

So, this project is truly a Celebration of Simple!


I stamped the pennants on to scraps and cut them out with pinking shears, then sewed the top of each pennant to a square of fabric that I had hemmed at the top. I stamped the sentiment on the same piece. I then sewed two squares together (back to back) and turned them right side out.

I thought it was a little plain, so I added some fun buttons at the top with embroidery thread.

Supplies:


  • Fabric - Moda 
  • Buttons - Buttons Galore
  • Stamps - Susan K Weckesser for Unity
  • Ink - Tsukineko/Imagine Crafts "Stazon" Inks
  • Embroidery Thread and Sewing Thread - Coats & Clark
  • Dye - Rit Dye
  • Shears - Fiskars

Now, I have a fun little bag for gift giving. It's all about the presentation, right? What would you use a fun little bag for?

Thanks for joining me, I've really enjoyed guest designing for Susan and friends!


Wednesday, August 28, 2013

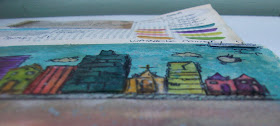
Oh the windy city is mighty pretty . . .

 Hi everyone, Tracy here today and I`m sooo excited to be sharing a journal page with you all using the
 from the
that Susan designed for Studio 12 which is available in the UK from Polkadoodles, woohoo!

So I was sitting in my shed thinking about my youngest, who has just moved to the big City to live, to attend University when I SPIED this stamp and my brain started to tick, tick, tick . . . .
 . . . it`s as if it was just sitting waiting on this day to arrive!

Out came my old second hand book, a few paints and Distress Stains and I was off . . .

. . . okay I admit I got carried away so no step by steps, but it is soooo easy to re create!

Just ink up the stamp with an Archival ink pad, stamp straight onto your chosen journal and again on a loose sheet of paper.
 I used a mixture of watercolors and Distress Stains to color the background and images before splattering with a little water and Distress Stains.
 To add a little dimension I snipped out a few buildings from the extra sheet, before fixing in place with foam pads.

Now if you know me, you will know by now I looove to scribble and doodle doodle dooo
 . . .soooo . . .
 . . . out with a fine black liner pen and away I went adding a little along the way.
Here`s a look at the opposite page which I looove to use to keep a record of all the products.
 Well that`s all from me today.
Thank you for looking.
Till next time
Happy crafting friends!!

Susan K Weckesser Design Team Member

Monday, August 26, 2013

DIY decorative cans- a fresh start!

 Hey there Rita Barakat here! And if you are like me kids are back in school! Yay!
Back to school is just like New Years- a fresh start!
Time to re-group, re organize and maybe set some goals!
Of course having pretty things around to help with those goals
is always a bonus!
Today I decorated this sweet little can with Susan K Weckesser whimisical paper!
A little twine and burlap added the finishing touches!
Around here we save anything that I (or the kids) could use as a craft, this can is
the perfect size! I have been saving these and I am thinking how
cute would it be to have a bunch of these line up in a row? I saw that quote and
thought that would be perfect-
A vision is not just a picture of what could be; 
it is an appeal to our better selves, a call to 
become something more.

Rosabeth Moss Kanter
Not just for the can (LOL) but for life, a fresh start, a new year!
Today is a great day to start over! Or keep working towards those goals!
Have a wonderful first day!

Supplies
Susan K. Weckesser Whimsical Paper
DCWV Burlap stack
Cord
                                                                          Empty can
adhesive
 photo 30f97b72-4f96-4dea-ae94-1e7248df6f50_zps1fa57618.jpg

Thursday, August 22, 2013

Susan K. Weckesser Inc. 2013 Design Team Call


Design Team Call yes[17]1

What a WONDERFUL year! I have been SO blessed to have such an AMAZING Design Team this past year! The women that have been on my first ever design team have not only been so INCREDIBLY talented, but they have been SO supportive to each other, to others in the industry and around them and to me! I have sat back and been so AMAZED as I read posts, looked at GORGEOUS artwork, read heart-touching blog posts and received sweet messages….. What an INCREDIBLE year!!! I can not say enough good things about each of these special designers on my team. Except {THANK-YOU} to each and every one of them and I hope that they know that they will always have a home here at Susan K. Weckesser Inc. Especially as we embark down new and exciting new roads! I am SO PROUD to know each and every one of them and to have had them as Susan K. Weckesser Designers!!!

So as my creative calendar flips a years, it is time for me to have a new DESIGNER CALL!

I would love to here from you if you are interested in being creative, and ‘UPLIFITNG’ those around ya! We love to smile around here!

So….. what would be expected of you. I like to keep things as STRESSFREE and UPLIFTING as possible but I have to say some of these things so I can keep things as STRESSFREE as possible for my WONDERFUL DT Coordinator Cheryl Boglioli. She really ROCKS!

Here is Cheryl, in case your haven’t met her!

1005342_10201189527796670_47478139_n

Oh, and here is Sherry Mendoza…She is working on a SUPER AWESOME project with Susan K. Weckesser Inc. this year!

What we expect from our Design Team:

· Provide at least ONE blog post per MONTH using SKW Inc. products complete with photographs, easy to follow steps, & links to products.

· ONE blog post per month on DT members own blog using SKW Inc. product.

· Provide a link to SKW Inc. blog & website to DT Member blog, twitter or Facebook page during the term.

· Add a SKW Inc. logo to blog or website for the duration of the term OR add “Susan K. Weckesser Inc. Design Team Member” in the signature line for fields of creative type forums or bulletin boards.

· Take part in &/or help promote any challenges and blog hops put on by Susan K. Weckesser Inc.

· Communicate via Twitter, Facebook, your blog about the happenings at SKW Inc. and the other DT member’s creations using SKW Inc. products.

What your can expect from Susan K. Weckesser Inc. :

· SKW Inc. products to design with.

· Endorsement Fees will be provided for DT members that have work published.

· SKW INC. Banner and/or blog link.

· Any partnering product that might happen during the DT term080

IF you would like to be on the Susan K . Weckesser Inc. we would LOVE to hear from you!

Remember, the DEADLINE is September 29,2013.

If you have any questions feel free to contact me at susiebeestudios@gmail.com.

Good Luck!

hugs,

Susan xo

Wednesday, August 21, 2013

A Journal Page with a Secret

Good Morning Everyone!! Lynne here, and today for my design team post I want to do something a little bit different.  I want to share with you a page from my private art journal and give you a tiny peek into my art brain and to describe a little bit about how my creative process works.  But before I share my page with you I want to share the two guidelines I have made for myself that have made my Art Journaling so much easier and a wonderful journey at the same time!  First I am allowed to use only what is on the counter in front of me (otherwise I become paralyzed with too much choice!) and Second I have to DO whatever my first thought is... No Thinking... otherwise I over think.  I worry waaaay too much about what is "right" or what looks good or what the rules are.... so I made a rule for myself that in my Art Journal ... No Rules Apply and no thinking!  And this applies to what I write as well... I put my pen down and write whatever comes into my head... No Matter What.  Follwing these two rules have taken all the pressure off me when I sit down to "do art" and I love seeing the end result of what comes out of my heart and soul when I am not paying attention!
I started the bones of this page a while ago using a stencil and pushing some modeling paste through it and letting it harden - and there it sat until I was surrounded by scraps from the last layout I created for my design team post.  I also had in front of me - all my dylusion sprays including my new White Linen opaque spray and a cup full of gel pens from my doodling journal.  I sprayed the page with pink and blue dylusions inks and then added a few spritzes of water to soften the colors, letting it run where ever it would. Mostly it ran into the cracks of the stencil pattern which was just fine with me!
Next I glued down all the leftover bits from my last scrapbooking layout without thinking too much about where I wanted them... if it felt right I glued it down.  The word scraps "Beautiful Daydreams" and "Bouqet" are actually the title strips that I cut off the SKW patterned papers I used... Cool huh!  I drew in the word CREATE, and colored it in blue gel pen, but it was too bold for my taste so I faded it back by doodling patterns in white gel pen all over the letters... the end result looked so good I just had to accent it using my liquid glass.
At this point the top of the page started looking a little empty so I stamped some more words in pink ink but again these words seemed too bold for me so I sprayed the entire page with my new white linen dylusions ink and blotted off the excess - it worked like a charm - fading back the too bold words to just where I wanted them.
And finally I just HAD to use this house I had created from Susan's Le Mason stamp, stamping it on three different patterns of paper, cutting it out and reassembling it in colored paper - but if I glued down the house Where would I put my journaling? and then the AH-HA! moment occurred... I would make it a hidden journal box... behind my house...BRILLIANT! And I LOVED it... using some duct tape for strength covered over with some washi tape for decoration this "Journal Flap" will stand up to all the flipping I can give it! 
And just when I thought I was done my brain said "Spatter!  You want some white Spatter!"  To get this wonderful solid white splatter I used some watered-down gesso... it really, really works.  And as aways (for me) the final touches with my stickles and a black pen finished off this soft and pretty page.

Well I hope you enjoyed this little trip into my "Art Brain"... and maybe you want to try adopting my little rules to help you take some pressure off yourself and allow you to follow your own artistic instincts and start your own Art Journal!  Just DO IT!
Cheers!
Scrapbook Lynne Mizera
PS:  If you are curious about what I wrote on this journal page, come visit my Blog post where I shared it with all my followers...smile

On this project I used Susan K. Weckesser's Bouquet paper and Le Mason Unity Stamp


Monday, August 19, 2013

Change your mood

 Hey they arsty peoples, Rita Barakat here! Today is a good day!
And if it's not find or create something lovely to look at. 
Something that can change your mood. 
Because time wasted is time spent brooding, worrying or miserable.
I created this cheery piece by stamping a heart and sentiment on burlap.
 The frame was wood and I painted it to match my piece.
So what will you do today? 
Find something lovely to look at?
Or create something that gives you a little peace?
Supplies: Paper -Susan K Weckesser Live, Love Create,
Susan K Weckesser/Unity Stamps- A little grunge Love stamp set
Insta-cute stamp set
Frame-ArtMinds
Felt Bird-Jolees Boutique
Faber Castell Stampers Big Brush pens
Paint- Tattered Angels Glaze & Silks
DCWV Burlap stack
Jute
 photo 30f97b72-4f96-4dea-ae94-1e7248df6f50_zps1fa57618.jpg

Friday, August 16, 2013

Tough to make but so appreciated!

Hello this is Julie.
Do you struggle with Sympathy Cards....I do!
In fact, sometimes, despite my best intentions, they neither get made nor sent.
This past weekend after a conversation with a widowed friend about the loneliness of grief I thought long and hard about my feelings. Loss of family and friends is an experience we all face, often quite unexpectedly.


After my friend had gone I had to make two sympathy cards and so rather reluctantly I began.


Now Susan K. Weckesser is known for a whimsical and light style but it was in fact some remnant papers and her super Washi Tape Stamps for Unity that began a creating session.

Using Time To Create Handmade Embellishments meant I had my two cards done in a little time.
Why not, I thought, create some more cards to have on hand?


Inside this one it says "I'm thinking of You!


I don't like "With Sympathy", so instead I use words that will have meaning for the recipient and enable me to be personal in what I write.


If my card can reach out to a bereaved friend and let them know I care then perhaps the loneliness will be lessened a little. I know how I have appreciated the thoughtful gestures and kindness we have received over the last few years.


After all, a response that is heartfelt and real will always ease sadness, even if it is just a little.
Thoughtfully yours
Julie

Thursday, August 15, 2013

Celebration of Simple - a Pinwheel Bouquet


Supply List

  • Stamps - Celebration of Simple by Susan Weckesser (Unity Stamp Company)
  • Cardstock - Neenah Solar White
  • Copic Markers - Y02, R20, R29, BG45, YG06, BG10, YR04
  • Sharpie - Laura Kelly
  • Tsukineko Memento Inks - Tangelo, Bahama Blue, Lady Bug, Bamboo Leaves
  • Pinwheel SVG - My Card Party 
  • Bling - Bulk Bling from Want2Scrap
  • Buttons - Buttons Galore & More
  • Twine - Coats & Clark, The Twinery, My Mind's Eye, Doodlebug Design
  • Adhesive - Glue Dots, AdTech Hot Glue Gun and Glue Sticks
  • Skewers (available at your local grocery)
Other - Silhouette Cameo, Pinwheel file available for download below.

Instructions

  1. Cut 4 pinwheels. 
  2. Stamp images and color. Add random doodles.
  3. Place a large glue dot in the center of the pinwheel. Roll one of the blades of the pinwheel from the outer corner towards the center. Tip - use a fat sharpie and roll paper so that you don't crease the blades of the pinwheel.
  4. Repeat with other corners, always heading in the same direction.
  5. Prepare 8 buttons. Layer several colors of twine together. Use string to tie the twine to the button (with the knot at the back). Trim twine and fluff up. Add bulk bling with glue dots. Adhere button to the center with a generous dollop of hot glue.
  6. Repeat with all pinwheels.
  7. Add a large dollop of hot glue to the back of each pinwheel and press a skewer gently into the glue. Allow to cool. Add some more glue and add a button to the back. Note - you can trim the skewers to different lengths before or after. I like to leave the pointy end at the bottom, so they can be placed in the ground, or into styrofoam with ease.

Click here to download Pinwheel.

Monday, August 12, 2013

Celebrating the Simple Things...

Hello Everyone!  Lynne here today and I want to share with you a layout that I created after having two of my grandsons here with me for three amazing, wonderful, joyful weeks. 

As I have grown older and maybe a wee bit wiser I have come to realize that it really is those simple things that you are doing Right Now that will make the sweetest and longest-lasting memories.  So I created this layout to celebrate some of those little things that I hope my grandboys will remember fondly when I am long gone and they are much, much older!

Like a double scoop of ice cream and a HUGE piece of homemade beef jerky from the Bergen General Store all eaten by the river; Or a dip in Poppa's hot tub every morning after breakfast when the mountain air is still quite chilly.


I also wanted to show you how you can scrapbook a "boy page" using flowers and butterflies and sparkle and it is STILL a boy page!  Susan's paper line makes it easy to impart a bright and cheerful feel to the page without it being too "girly", and I balanced sparkly stickles with some pearlescent stickles to give the page a little more down to earth feel. 

So while you are spending time with your family this Summer take a mental note of some of those simple things you do together so you too can make a memory page for their future.
Cheers
Lynne Mizera
(and for more of my philosophy on life and grandchildren - visit my blog - Grin)
As well as Susan's paper I used the following stamp sets on this layout:
Celebration of Simple
Create Your Day
The Happy Homestead


Friday, August 9, 2013

Summer fun frame

Hey there crafty friends! Einat Kessler here with a fun and easy project you can create with your kids! A super easy frame for a summer fun photo!

These summer days are perfect for all kinds of water activities...the beach, the pool as long as it's cold and refreshing! This frame project is so easy you can create it with your kids.

Start by cutting a 5" X 7" chipboard square. Then create a frame by removing a 4" X 6" square from the middle. Color the frame with blue acrylic paint or distress ink.


Stamp the wonderful boat stamp from the Sail Away stamp set on Beautiful Daydreams paper and cut it out. Color the boat and the waves with coloring pencils. Adhere the boat to the bottom of the frame.


Cut the sun from the same paper and adhere it to the frame as well.


Then stamp the cute kite from Fly Away set twice. Cut both of them out. Color with coloring pencils. Adhere the kite to the frame. Add a string to the kite and tie around the frame. Then cut the small ribbons from the second stamps and add them on top of the string.

That's it..you're done! This project is really easy and could be a perfect project for children. You can create a set of a few frames for more summer fun photos!

Have fun creating!
Einat

Wednesday, August 7, 2013

Birds of a feather with Susan K Weckesser/Studio 12

 Hi everyone, Tracy here today to share a quick project using 
one of the stamp sets that Susan K Weckesser designed for Studio 12 over at Polkadoodles and is available in the UK, woohoo!
It`s a cutie.
I will apologise in advance as I don`t have any step by step pictures today, but this is super easy to recreate, promise.
 Just start with a quick layer of Gesso over an off cut of wood, leave to dry or if you are impatient like me ... then blast it with your heat tool.
 Get out your Pan Pastels in 2 colors and apply all over the block of wood, apply some white Pan Pastel next and finish with a little Black Pan Pastel around the edges.
 Time to ink up the stamp using an Archival ink pad and color with Watercolor paints. To add more definition I went around the outline with a black liner pen, adding a few doodles along the way.
 Stamp the little birdie a second time and cut out the wing to make it look more 3D.
 Next I stamped the sentiment onto card, chopped it up and applied a little Walnut Stain Distress Ink with a blending tool around the edges.
I fixed them in place with a hot glue gun and added a few more doodles.
Can you see the text on the left . . . I applied Pan Pastel to a script stamp that I won from  
Unity Stamp Co recently { woohoo}and  randomly stamped it over the block of wood.
To finish a touch of a Clear Embossing pad followed by some Cosmic Shimmer Embossing powder for a little touch of texture.
Thank you so much for taking the time to look.
Till next time
Happy Crafting
Susan K Weckesser Design Team Member

Tuesday, August 6, 2013

Little house card...

Hi every home you have been having a great few weeks since my last post.  I see lots  of great projects being posted here, very inspirational.  This week I am sharing with you a shaped card.  First I started off with the Live, Love, Create piece of paper and cut out the house from it.

I proceeded to doodle all over the image with a fine tip brown marker.  I am not usually a person who doodles but have been inspired by Susan to be free in my random doodling!  I out lined the house parts with a stitching, drew a few flowers and added a scallop to resemble roof tiles.

I then folded a piece of card stock over an made a crease in it.  I glue the house close to the folded edge and then cut around the picture to make a house shaped card.  I cut out the door way so someone could peek inside the house.....

I then cut some swirls from the pattern paper and attached it to the chimney for a homey effect.   

For the inside I cut out a flower from the Bouquet paper and pasted it inside.  I also doodled with the same pen and made stitching around everything and making some more flowers.  Inside I glued a sentiment down, it reads "celebrate home and family" 


Really a simple little card using a few pieces of paper and a pen!  I am starting to like this doodling thing!  I am trying not to be to caught up in everything being perfect....I must try it more!

Well that is it for this week, hope everyone is doing great...till next time...!

Jennifer